Ingredients
Equipment
Method
Preparation Steps
- Step 1: Gather Your Ingredients - Collect all your ingredients: 2 cups of all-purpose flour, 1 ½ cups of sugar, ½ cup of unsalted butter, 1 cup of milk, 3 eggs, 2 tsp of baking powder, 1 tsp of vanilla extract, and blue and green food coloring.
- Step 2: Preheat the Oven - Preheat your oven to 350°F (175°C). This will ensure your cake bakes evenly and comes out perfectly fluffy!
- Step 3: Mix the Dry Ingredients - In a large bowl, whisk together the flour and baking powder. This helps to aerate the flour and ensures a light cake.
- Step 4: Cream the Butter and Sugar - In another bowl, beat the butter and sugar together until light and fluffy. This usually takes about 3-5 minutes.
- Step 5: Add the Eggs and Vanilla - Crack in the eggs one at a time, mixing well after each addition. Then, stir in the vanilla extract for that lovely aroma!
- Step 6: Combine Wet and Dry Ingredients - Gradually add the dry mixture to the wet mixture, alternating with the milk. Mix until just combined—don’t overmix!
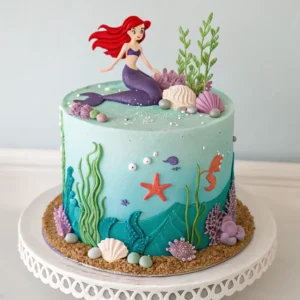
- Step 7: Add Food Coloring - Divide the batter into two bowls. Add blue food coloring to one and green to the other. Swirl them together gently for a beautiful ocean effect.
- Step 8: Bake the Cake - Pour the batter into greased cake pans and bake for 25-30 minutes. Check with a toothpick; it should come out clean!
- Step 9: Cool the Cakes - Once baked, let the cakes cool in the pans for 10 minutes, then transfer them to a wire rack to cool completely.
- Step 10: Decorate Your Cake - Once cool, frost with blue and green buttercream. Use mermaid-themed decorations like edible pearls and seashells for that magical touch!
- Step 11: Serve and Enjoy! - Slice up your stunning Ariel Mermaid Birthday Cake and watch the smiles light up the room. Enjoy every delicious bite!