Have you ever craved fresh, fluffy rolls but dreaded the long wait for dough to rise? If so, you’re in for a treat! No yeast rolls are not only quick to prepare, but they also deliver a light and airy texture that will impress your family and friends. Whether you’re a busy parent looking for a time-saving baking solution or a culinary enthusiast eager to try something new, these rolls are perfect for you. They require just a handful of pantry staples, making them an ideal choice for last-minute meals or gatherings. So, gather your ingredients, and let’s dive into the delightful world of no yeast rolls!
Table of Contents
Key Benefits of No Yeast Rolls
If you’re looking for a quick and delightful addition to your meals, no yeast rolls are the answer! These little gems are not only easy to make, but they also come with a host of benefits that make them a favorite in many kitchens. Here’s why you should consider whipping up a batch:
- Quick Preparation: Unlike traditional yeast rolls, no yeast rolls require minimal time. You can have them ready in under 30 minutes, making them perfect for busy weeknights or last-minute gatherings.
- Beginner-Friendly: If you’re new to baking, no yeast rolls are a fantastic starting point. There’s no need to worry about proofing or kneading, which can be intimidating for beginners.
- Fluffy Texture: Despite their simplicity, these rolls can be incredibly fluffy and light. The combination of baking powder and the right mixing technique ensures a delightful texture that pairs well with any meal.
- Customizable: You can easily add your favorite herbs, cheeses, or spices to the dough. This versatility means you can tailor the flavor to suit your family’s preferences.
- Time-Saving: With no need for rising time, you can enjoy freshly baked rolls without the wait. This is especially handy when you want to impress guests with homemade bread but are short on time.
In summary, no yeast rolls offer a wonderful blend of convenience and taste. They’re perfect for home bakers of all skill levels, and they fit seamlessly into any meal. So, why not give them a try? You might just find your new favorite recipe!
Ingredients for No Yeast Rolls
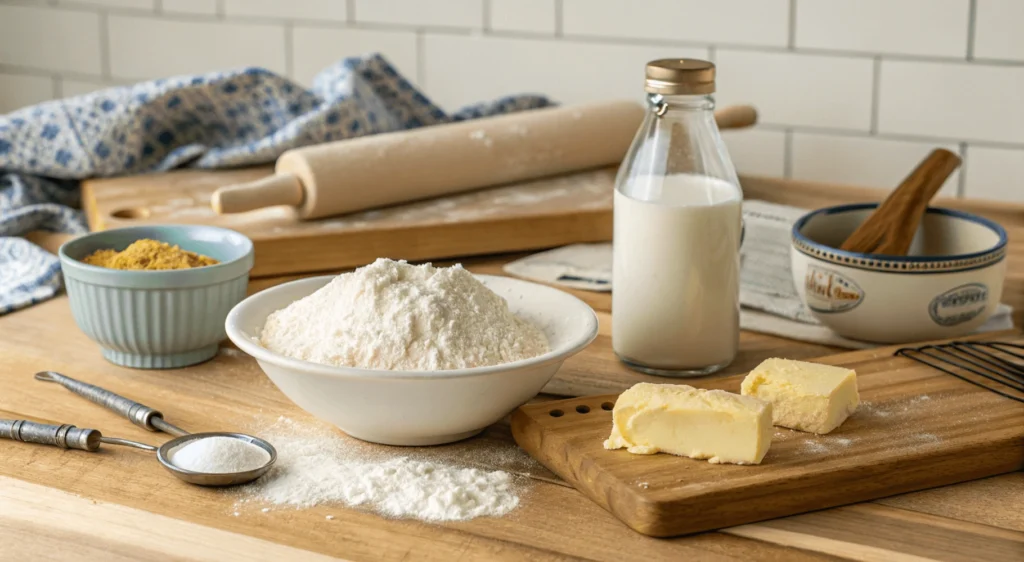
Making no yeast rolls is a delightful experience, especially when you have the right ingredients on hand. Here’s what you’ll need:
- 2 cups all-purpose flour: This is your base. For a gluten-free option, you can substitute with a gluten-free flour blend.
- 1 tablespoon baking powder: This is crucial for that fluffy texture. Make sure it’s fresh for the best results.
- 1 teaspoon salt: A must for flavor. You can adjust this based on your dietary needs.
- 1 tablespoon sugar: This adds a hint of sweetness. If you prefer, you can use honey or maple syrup instead.
- 1 cup milk: Whole milk works best, but feel free to use almond or oat milk for a dairy-free version.
- 1/4 cup melted butter: This adds richness. You can substitute with olive oil or coconut oil if you’re looking for a healthier option.
- 1 large egg: This helps bind everything together. For a vegan alternative, consider using a flax egg.
- Optional add-ins: Think herbs, cheese, or even garlic powder for extra flavor. These can elevate your no yeast rolls to a whole new level!
When selecting your ingredients, always opt for the freshest options available. This not only enhances the flavor but also ensures the best texture in your no yeast rolls. Additionally, feel free to get creative with your add-ins; after all, cooking is about personal expression. So, gather your ingredients and let’s get rolling!
How to Make No Yeast Rolls
Making no yeast rolls is a delightful and straightforward process. Follow these easy steps, and you’ll have fluffy, golden-brown rolls ready in no time!
- Gather Your Ingredients: First, collect all your ingredients. You’ll need 2 cups of all-purpose flour, 1 tablespoon of baking powder, 1 teaspoon of salt, 1 tablespoon of sugar, 1 cup of milk, 1/4 cup of melted butter, and 1 egg. Additionally, feel free to add herbs or cheese for extra flavor.
- Preheat the Oven: Before you start mixing, preheat your oven to 400°F (200°C). This ensures your rolls bake evenly and rise beautifully.
- Mix Dry Ingredients: In a large mixing bowl, whisk together the flour, baking powder, salt, and sugar. This step is crucial because it evenly distributes the leavening agent, ensuring your no yeast rolls rise properly.
- Add Wet Ingredients: Next, create a well in the center of your dry ingredients. Pour in the milk, melted butter, and beaten egg. Stir gently until the mixture comes together. Be careful not to overmix; a few lumps are perfectly fine!
- Knead the Dough: Turn the dough out onto a lightly floured surface. Knead it gently for about 1 minute. This helps develop the gluten, giving your rolls a nice texture. Remember, you want a soft and slightly sticky dough.
- Shape the Rolls: Divide the dough into equal portions, about the size of a golf ball. Roll each piece into a smooth ball and place them on a greased baking sheet. Make sure to leave some space between each roll, as they will expand while baking.
- Bake: Pop the baking sheet into your preheated oven. Bake for 15-20 minutes or until the rolls are golden brown on top. The aroma will be irresistible!
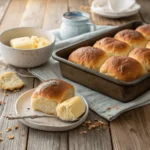
- Cool and Serve: Once baked, remove the rolls from the oven and let them cool for a few minutes. Serve them warm with butter, or enjoy them plain. They’re perfect for any meal!
And there you have it! These no yeast rolls are not only quick to make but also incredibly satisfying. Enjoy the process, and don’t hesitate to experiment with flavors!
Pro Tips, Variations, and Common Problems for No Yeast Rolls
Making no yeast rolls can be a delightful experience, especially when you have a few pro tips up your sleeve. Here are some expert insights to ensure your rolls turn out perfectly every time!
Pro Tips
– Use Fresh Ingredients: Always check the expiration dates on your baking powder and flour. Fresh ingredients lead to better texture and flavor.
– Don’t Overmix: When combining your ingredients, mix just until everything is incorporated. Overmixing can lead to dense rolls, which is not what we want!
– Adjust the Consistency: If your dough feels too sticky, add a little more flour, one tablespoon at a time. Conversely, if it’s too dry, a splash of milk can help.
– Preheat Your Oven: Ensure your oven is fully preheated before baking. This helps achieve that golden brown crust we all love.
Creative Variations
– Herb-Infused Rolls: Add dried herbs like rosemary or thyme to the dough for a fragrant twist. This enhances the flavor and makes your rolls stand out.
– Cheesy Goodness: Mix in shredded cheese, such as cheddar or mozzarella, for a savory addition. This variation is perfect for pairing with soups or salads.
– Sweet Rolls: For a sweeter option, incorporate a tablespoon of sugar and a dash of cinnamon. These rolls are delightful with butter or jam!
– Gluten-Free Option: Substitute regular flour with a gluten-free blend. Just ensure your baking powder is also gluten-free for the best results.
Common Problems and Solutions
– Dense Texture: If your rolls turn out dense, it might be due to overmixing or using old baking powder. Remember, mix just until combined and check the freshness of your ingredients.
– Burnt Bottoms: To avoid this, place your baking sheet on the middle rack of the oven. If they still burn, consider using parchment paper for an extra layer of protection.
– Underbaked Centers: If the outside looks done but the inside is still doughy, lower the oven temperature slightly and extend the baking time. This ensures even cooking throughout.
– Lack of Flavor: If your rolls taste bland, don’t forget to season your dough! A pinch of salt can make a world of difference, enhancing the overall flavor.
With these tips and variations, you’re well on your way to mastering no yeast rolls. Enjoy the process, and don’t hesitate to experiment with flavors and ingredients. Happy baking!
Serving Suggestions for No Yeast Rolls
When it comes to serving no yeast rolls, the possibilities are as delightful as the rolls themselves! These quick bread rolls are not only fluffy and light but also incredibly versatile. Here are some engaging ideas to elevate your dining experience:
Plating Ideas
To make your no yeast rolls visually appealing, consider the following plating tips:
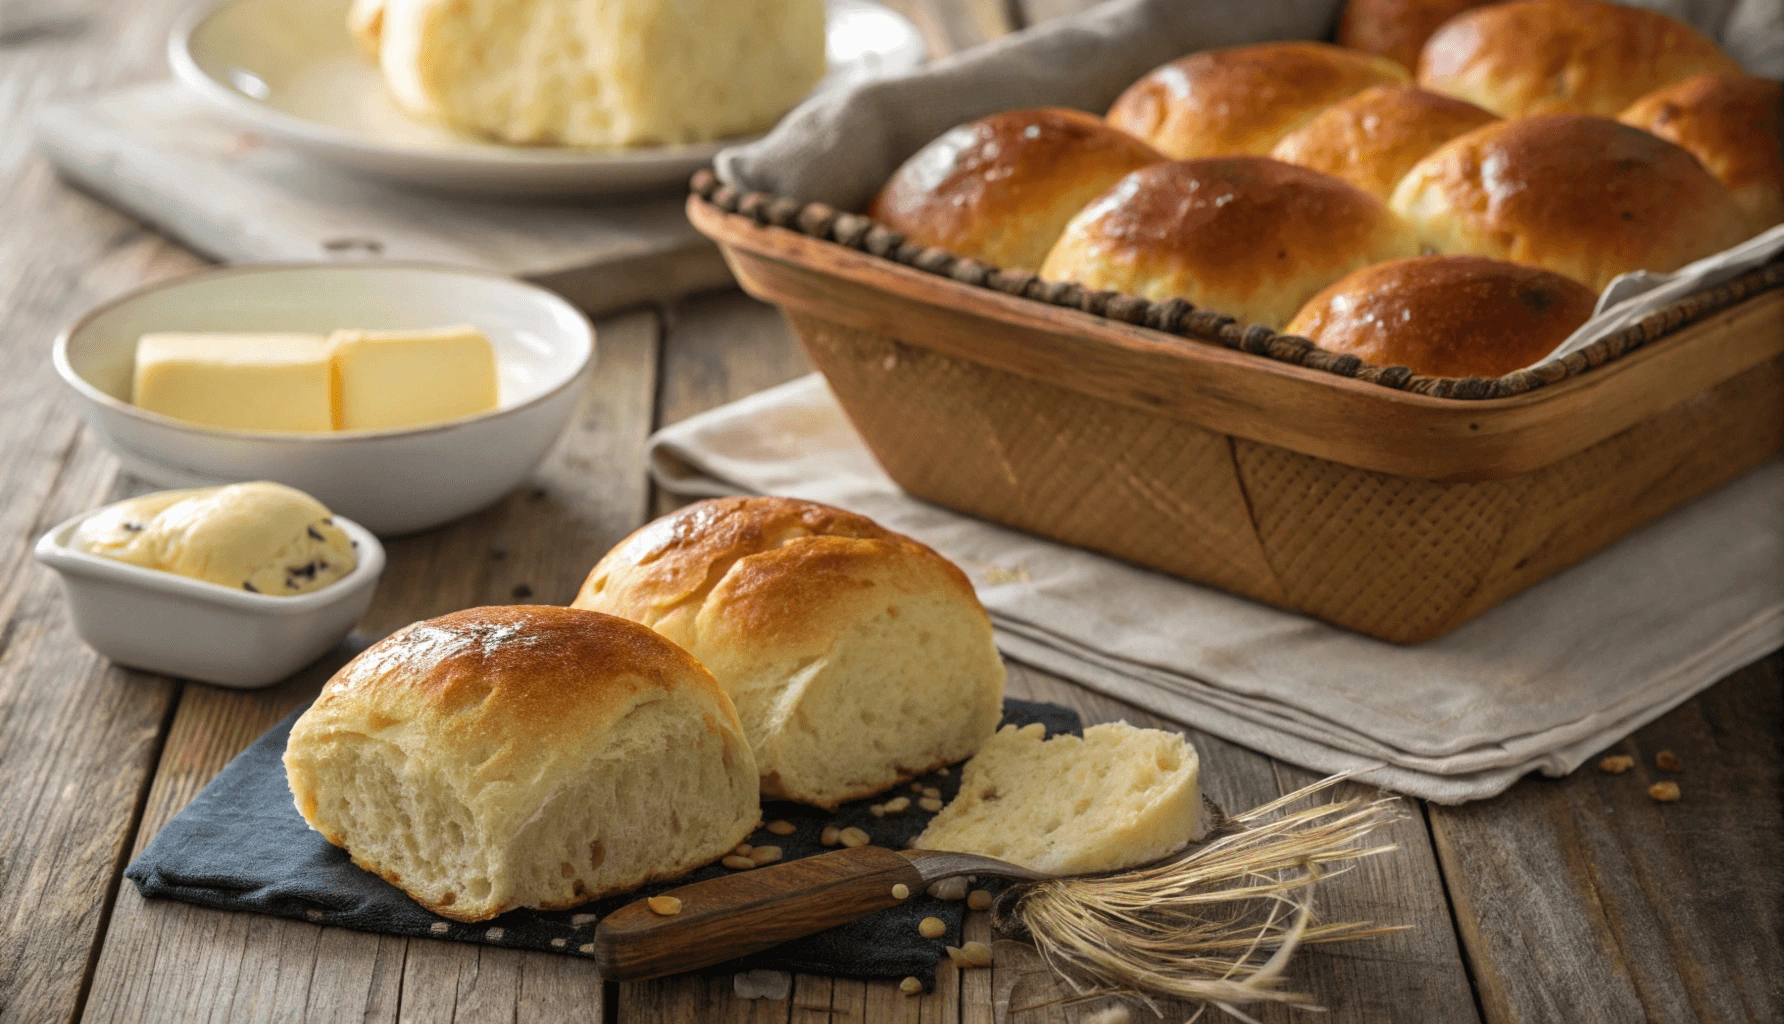
- Arrange the rolls in a rustic basket lined with a colorful cloth. This adds a homey touch and invites guests to dig in.
- For a more elegant presentation, place the rolls on a beautiful serving platter. You might even sprinkle some fresh herbs on top for a pop of color.
- Consider stacking the rolls in a pyramid shape. This not only looks impressive but also makes it easy for guests to grab one.
Side Dish Pairings
No yeast rolls pair wonderfully with a variety of dishes. Here are some suggestions:
- Serve them alongside a hearty soup, such as tomato basil or chicken noodle. The rolls are perfect for dipping!
- They also complement salads beautifully. Try them with a fresh garden salad or a creamy potato salad for a satisfying meal.
- For a more indulgent option, serve the rolls with a rich, savory stew. The fluffy texture of the rolls will soak up all the delicious flavors.
Creative Serving Options
Whether you’re hosting a casual gathering or an elegant dinner, these serving ideas will impress:
- For a family-style meal, place the rolls in the center of the table. Encourage everyone to help themselves, creating a warm, communal atmosphere.
- If you’re aiming for a more sophisticated setting, consider serving the rolls with a selection of gourmet spreads, such as herb-infused butter or homemade jams.
- For breakfast or brunch, serve the rolls warm with a side of honey or fruit preserves. They make a delightful addition to any morning spread!
In conclusion, no yeast rolls are not just a side dish; they can be a centerpiece of your meal. With these serving suggestions, you can create a memorable dining experience that your guests will rave about. So, gather your ingredients and get ready to impress!
Preserving and Reheating No Yeast Rolls
When it comes to enjoying your delicious no yeast rolls long after they come out of the oven, proper storage and reheating are key. After all, you want to maintain that fluffy texture and delightful flavor, right? Let’s dive into the best ways to store and reheat these delightful rolls, ensuring they remain a family favorite.
Storage Tips
To keep your no yeast rolls fresh, start by allowing them to cool completely. Once cooled, place them in an airtight container. This method helps to lock in moisture and flavor. If you plan to enjoy them within a few days, storing them in the refrigerator is perfectly fine. Generally, they will stay fresh for about 3 to 5 days in the fridge. However, if you want to keep them for a longer period, freezing is your best bet. Wrap each roll tightly in plastic wrap and then place them in a freezer-safe bag or container. This way, they can last up to 3 months in the freezer. Remember, it’s important to label your containers with the date, so you know when to use them. Additionally, always check for any signs of spoilage before consuming. If you notice any unusual odors or mold, it’s best to discard them to avoid any food safety issues.
Reheating Methods
Now, let’s talk about reheating your no yeast rolls to perfection. The oven is one of the best methods for preserving their texture. Preheat your oven to 350°F (175°C). Place the rolls on a baking sheet and cover them loosely with aluminum foil to prevent them from drying out. Heat them for about 10 to 15 minutes, or until they are warmed through. Alternatively, if you’re short on time, the microwave can work too. Just place a roll on a microwave-safe plate and cover it with a damp paper towel. Heat it for about 15 to 20 seconds. However, be cautious not to overheat, as this can lead to a chewy texture. For a crispy exterior, consider using an air fryer. Set it to 300°F (150°C) and heat the rolls for about 5 minutes. This method gives them a delightful crunch while keeping the inside soft. Lastly, if you want to add a touch of moisture, you can brush the rolls lightly with melted butter or sprinkle a few drops of water before reheating. This little trick can work wonders in refreshing your rolls!
Conclusion
As we wrap up this delightful journey of making no yeast rolls, let’s take a moment to appreciate how simple and satisfying this recipe truly is. By combining basic ingredients like flour, baking powder, and milk, you can create fluffy, light rolls without the need for yeast or rising time. This makes them not only a quick baking option but also a versatile addition to any meal, whether it’s a cozy dinner or a festive gathering. So, don’t hesitate to roll up your sleeves and give this recipe a try; you might just discover a new family favorite!
Share Your Experience
We would love to hear about your baking adventures! Feel free to share your results or ask any questions you may have in the comments below. Additionally, consider experimenting with different flavors or add-ins, such as herbs or cheese, to make these rolls your own. Remember, cooking is all about creativity and fun, and no yeast rolls are a fantastic way to express that in your kitchen.
In conclusion, embrace the joy of homemade rolls and the culinary satisfaction that comes with them. Happy baking, and may your no yeast rolls turn out perfectly every time!
Frequently Asked Questions about No Yeast Rolls
Welcome to our FAQ section! Here, we address some common questions about no yeast rolls to help you bake with confidence.
1. Can I use whole wheat flour instead of all-purpose flour?
Absolutely! You can substitute whole wheat flour for all-purpose flour. However, keep in mind that the texture may be denser. To achieve a lighter roll, consider mixing half whole wheat and half all-purpose flour.
2. What can I use instead of milk in the recipe?
If you need a dairy-free option, almond milk or oat milk works wonderfully in no yeast rolls. Additionally, you can use water, but the rolls may lack some richness.
3. How do I know when my no yeast rolls are done baking?
You’ll know your rolls are ready when they turn a lovely golden brown on top. Moreover, tapping the bottom of a roll should produce a hollow sound. This indicates they are fully baked!
4. Can I add herbs or cheese to the dough?
Definitely! Adding herbs like rosemary or thyme, or even cheese, can elevate the flavor of your no yeast rolls. Just fold them into the dough before shaping the rolls for a delicious twist.
5. How should I store leftover rolls?
To keep your no yeast rolls fresh, store them in an airtight container at room temperature for up to three days. If you want to keep them longer, consider freezing them. Just wrap each roll tightly in plastic wrap and place them in a freezer bag.
no yeast rolls
Discover how to make no yeast rolls that are fluffy and delicious! Perfect for any meal, these rolls are quick and easy to prepare. 🍞✨
- Mixing bowl
- Baking sheet
- Whisk
- measuring cups
- Measuring spoons
dry ingredients
- 2 cups all-purpose flour (Can substitute with gluten-free flour blend.)
- 1 tablespoon baking powder (Ensure it’s fresh for best results.)
- 1 teaspoon salt (Adjust based on dietary needs.)
- 1 tablespoon sugar (Can substitute with honey or maple syrup.)
wet ingredients
- 1 cup milk (Whole milk preferred; can use almond or oat milk.)
- 1/4 cup melted butter (Can substitute with olive oil or coconut oil.)
- 1 large egg (For a vegan option, use a flax egg.)
optional add-ins
- to taste herbs, cheese, or garlic powder (For extra flavor.)
Preparation
Gather all your ingredients: 2 cups of all-purpose flour, 1 tablespoon of baking powder, 1 teaspoon of salt, 1 tablespoon of sugar, 1 cup of milk, 1/4 cup of melted butter, and 1 egg. Optionally, add herbs or cheese for extra flavor.
Baking
Preheat your oven to 400°F (200°C). In a large mixing bowl, whisk together the flour, baking powder, salt, and sugar. Create a well in the center, then add the milk, melted butter, and beaten egg. Stir gently until combined, being careful not to overmix. Knead the dough on a floured surface for about 1 minute, then shape into rolls and place on a greased baking sheet. Bake for 15-20 minutes until golden brown. Let cool slightly before serving.
Essential nutrition facts per serving:
| Calories | Fat | Protein | Carbs |
|---|---|---|---|
| 150 | 6g | 3g | 22g |