Get ready to indulge in a creamy, dreamy vanilla ice cream that’s as easy to whip up as it is to devour! With just a handful of simple ingredients like rich cream, sweet vanilla extract, and a touch of sugar, your Ninja Creami will transform them into a luscious treat that’s perfect for any occasion. Whether you’re enjoying a sunny day or cozying up on the couch, this delightful dessert will bring a smile to your face. So grab your Ninja Creami and let’s make some magic happen! “ninja creami vanilla ice cream recipe”
Table of Contents
Why You’ll Love This Recipe
- Trust me, you’re going to love this creamy texture!
- This one’s a game-changer for homemade ice cream lovers.
- Simple ingredients mean you can whip it up anytime.
- Customize it with your favorite mix-ins for endless fun!
- Perfect for impressing friends and family at gatherings.
Recipe Snapshot
| Feature | Details |
|---|---|
| Category | Side Dish |
| Cuisine | American-inspired comfort food |
| Prep Time | 10 minutes |
| Cook Time | 15 minutes |
| Total Time | 25 minutes |
| Dietary | Vegetarian |
| Serves | 4 |
| Best Served | Hot and cheesy right off the cob! |
Ingredients
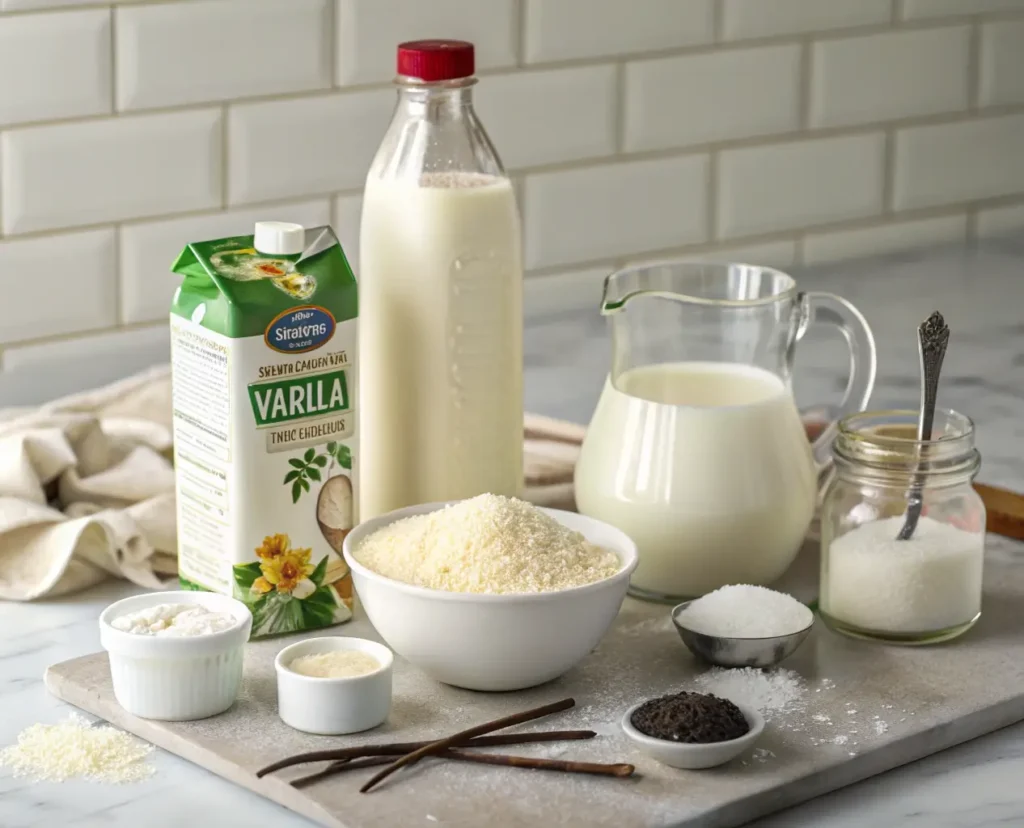
- Heavy Cream – Adds a rich and creamy texture to your ice cream.
- Whole Milk – Balances the creaminess and helps achieve a smooth consistency.
- Granulated Sugar – Sweetens the ice cream and enhances the vanilla flavor.
- Vanilla Extract – Provides a delightful vanilla aroma and taste.
- Salt – Enhances the overall flavor and balances the sweetness.
- Egg Yolks – Creates a custard base for a richer ice cream experience.
Ingredients with measurements will be right under the article in the recipe card.
How to Make the Recipe
Get ready to whip up some creamy goodness! Follow these simple steps for a delightful ninja creami vanilla ice cream recipe experience.
Step 1: Gather Your Ingredients
Collect 2 cups of heavy cream, 1 cup of whole milk, 3/4 cup of granulated sugar, 1 tablespoon of pure vanilla extract, and a pinch of salt.
Step 2: Mix the Base
In a large mixing bowl, combine the heavy cream, whole milk, sugar, vanilla extract, and salt. Whisk until the sugar is fully dissolved.
Step 3: Chill the Mixture
Cover the bowl with plastic wrap and refrigerate for at least 2 hours. This helps the flavors meld beautifully!
Step 4: Prepare the Ninja Creami
Once chilled, pour the mixture into the Ninja Creami pint container. Make sure not to overfill!
Step 5: Freeze the Mixture
Secure the lid on the pint container and place it in the freezer. Freeze for at least 24 hours for the best texture.
Step 6: Creamify Your Ice Cream
After freezing, remove the pint from the freezer. Install it into the Ninja Creami machine and select the “Ice Cream” function.
Step 7: Enjoy Your Creation
Once the cycle is complete, scoop out your creamy vanilla ice cream and serve immediately. Enjoy your delightful treat!
Pro Tips for Making the Recipe
- Use high-quality vanilla extract for a richer flavor.
- Chill your ingredients before mixing for a creamier texture.
- Experiment with mix-ins like chocolate chips or fruit for added fun.
- Let the ice cream sit at room temperature for a few minutes before scooping.
- Store in an airtight container to keep it fresh and prevent ice crystals.
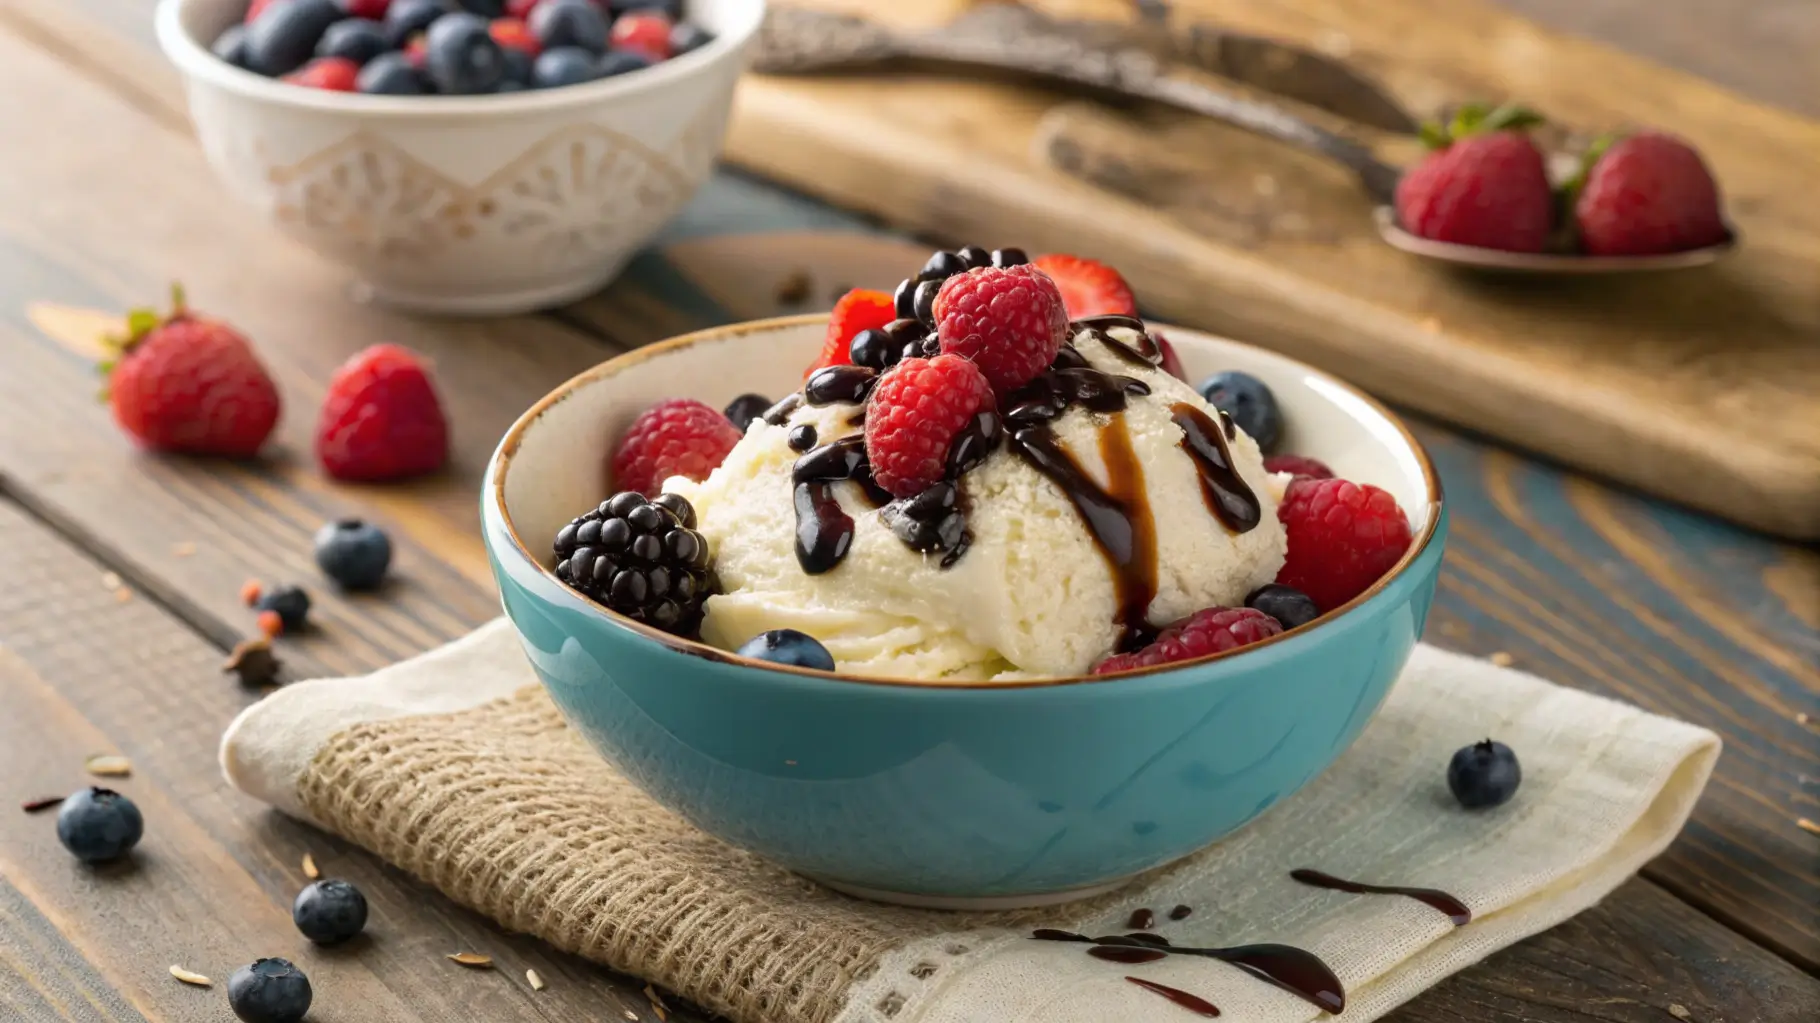
How to Serve
Enjoy your ninja creami vanilla ice cream recipe in these delightful ways:
- Top with fresh berries for a fruity twist.
- Drizzle with chocolate or caramel sauce for extra sweetness.
- Serve in a waffle cone for a classic treat.
- Add a sprinkle of crushed nuts for a crunchy texture.
- Pair with homemade brownies for a decadent dessert.
- Blend into a milkshake for a creamy drink.
- Layer with granola for a breakfast-inspired treat.
- Mix in your favorite cookie pieces for a fun surprise.
Make Ahead and Storage
To enjoy your ninja creami vanilla ice cream recipe at its best, proper storage is key.
Storing Leftovers
- Transfer leftovers to an airtight container.
- Leave some space at the top for expansion.
- Label the container with the date.
- Store in the freezer for up to 2 weeks.
Freezing
- Ensure the ice cream is fully cooled before freezing.
- Use a shallow container for even freezing.
- Cover tightly with plastic wrap before sealing the lid.
- Avoid frequent opening to maintain texture.
Reheating
- Let ice cream sit at room temperature for 5-10 minutes before serving.
- Use a warm scoop to make serving easier.
- Avoid microwaving, as it can alter texture.
FAQs
Can I use a different type of milk for this recipe?
Absolutely! You can substitute whole milk with almond milk, coconut milk, or oat milk for a dairy-free option. Just keep in mind that the creaminess may vary slightly depending on the milk you choose. ninja creami vanilla ice cream recipe
How can I make this recipe sweeter?
If you prefer a sweeter ice cream, feel free to add more sugar or use a sweetener like honey or agave syrup. Start with a tablespoon and adjust to your taste!
Can I add mix-ins like chocolate chips or fruit?
Definitely! Adding mix-ins like chocolate chips, crushed cookies, or fresh fruit can enhance the flavor and texture. Just fold them in gently before freezing for the best results. ninja creami vanilla ice cream recipe
How long does the ice cream last in the freezer?
Your ninja creami vanilla ice cream recipe can last up to two weeks in the freezer if stored in an airtight container. Just remember to let it sit at room temperature for a few minutes before scooping for easier serving!
Final Thoughts
There you have it—your very own ninja creami vanilla ice cream recipe! This delightful treat is not just a dessert; it’s a ticket to sweet nostalgia and joyful moments. So grab your spoon, scoop up that creamy goodness, and savor every bite. Remember, making ice cream at home is as simple as it is rewarding. Enjoy this delicious adventure, and share it with loved ones for extra smiles!
ninja creami vanilla ice cream recipe

Indulge in the creamy goodness of our ninja creami vanilla ice cream recipe! 🍦 Easy to make and utterly delicious, perfect for any occasion!
- Ninja Creami
- Mixing bowl
- Plastic Wrap
- Pint Container
Base Ingredients
- 2 cups Heavy Cream (Adds a rich and creamy texture to your ice cream.)
- 1 cup Whole Milk (Balances the creaminess and helps achieve a smooth consistency.)
- 3/4 cup Granulated Sugar (Sweetens the ice cream and enhances the vanilla flavor.)
- 1 tablespoon Vanilla Extract (Provides a delightful vanilla aroma and taste.)
- a pinch Salt (Enhances the overall flavor and balances the sweetness.)
- 4 Egg Yolks (Creates a custard base for a richer ice cream experience.)
Step 1: Gather Your Ingredients
Collect 2 cups of heavy cream, 1 cup of whole milk, 3/4 cup of granulated sugar, 1 tablespoon of pure vanilla extract, and a pinch of salt.
Step 2: Mix the Base
In a large mixing bowl, combine the heavy cream, whole milk, sugar, vanilla extract, and salt. Whisk until the sugar is fully dissolved.
Step 3: Chill the Mixture
Cover the bowl with plastic wrap and refrigerate for at least 2 hours. This helps the flavors meld beautifully!
Step 4: Prepare the Ninja Creami
Once chilled, pour the mixture into the Ninja Creami pint container. Make sure not to overfill!
Step 5: Freeze the Mixture
Secure the lid on the pint container and place it in the freezer. Freeze for at least 24 hours for the best texture.
Step 6: Creamify Your Ice Cream
After freezing, remove the pint from the freezer. Install it into the Ninja Creami machine and select the “Ice Cream” function.
Step 7: Enjoy Your Creation
Once the cycle is complete, scoop out your creamy vanilla ice cream and serve immediately. Enjoy your delightful treat!