
Have you ever wondered how to transform your camping trips into unforgettable culinary adventures? With a trusty Dutch oven in hand, the possibilities are endless. This timeless piece of cast iron cookware is your ticket to hearty, flavorful meals that bring everyone around the campfire closer. Whether you’re simmering a rustic stew, roasting tender meats, or even baking a dessert under the stars, dutch oven recipes camping make outdoor cooking a breeze.
Table of Contents
In this recipe, we’ll show you how to turn simple ingredients into magic, all while embracing the charm of campfire cooking. So, grab your gear, spark the fire, and get ready to create a dish that’s as satisfying as the journey itself!
Key Benefits of dutch oven recipes camping
Cooking with a dutch oven recipes camping is more than just a practical choice—it’s a game-changer for your outdoor adventures. Here’s why you’ll fall in love with it:
- Versatility at Its Finest: From slow-cooked stews to golden-brown breads and even decadent desserts, a dutch oven recipes camping handles it all. No need to lug around multiple pots and pans!
- Perfect for Campfire Cooking: The heavy cast iron ensures even heat distribution, making it ideal for cooking over open flames or with hot coals.
- One-Pot Wonders: Save time and effort with one-pot meals that minimize cleanup—because let’s face it, no one wants to do dishes in the great outdoors!
- Built to Last: A good dutch oven recipes camping is durable and designed to withstand rugged conditions, making it a long-term companion for your camping trips.
- Brings People Together: There’s something magical about gathering around a campfire, waiting for a warm, home-cooked meal to finish. It’s the perfect way to connect with loved ones.
With a Dutch oven in your camping kit, you’re not just cooking; you’re creating an experience that blends flavor, convenience, and the joys of outdoor living. So, let’s dive in and unlock the full potential of this camping essential!
Ingredients for dutch oven recipes camping
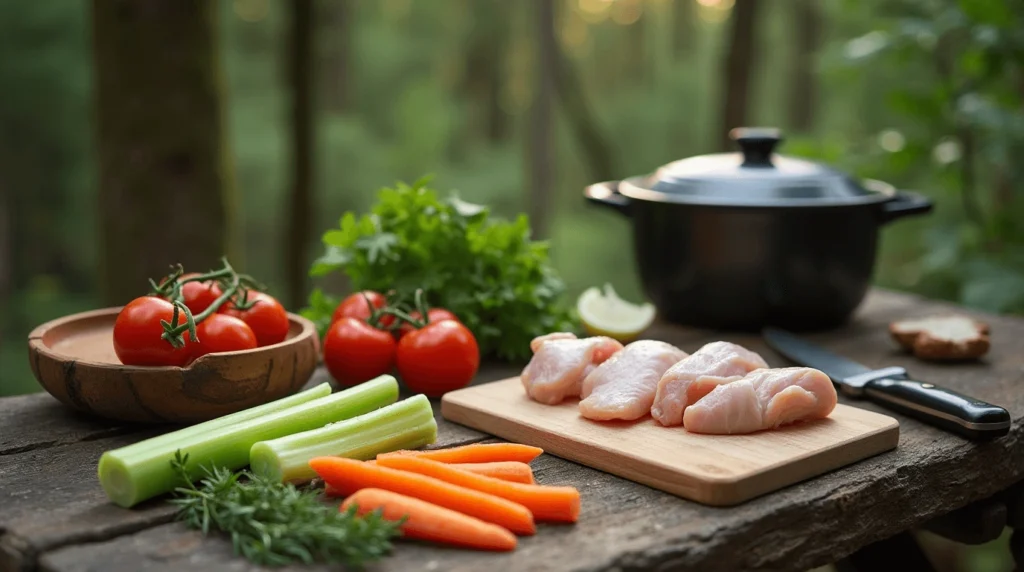
Before we dive into cooking, let’s gather everything you’ll need for this delicious camping adventure. These ingredients are simple, flavorful, and easy to pack for your trip. Here’s what you’ll want to have on hand:
For the Base:
- Protein of Your Choice: 1 lb of chicken thighs, ground beef, or plant-based meat alternatives.
- Vegetables: 2 cups of diced potatoes, carrots, or sweet potatoes for a hearty touch.
- Aromatic Veggies: 1 onion, diced, and 3 garlic cloves, minced—these will bring your dish to life.
For the Flavor:
- Seasoning Blend: 1 tsp salt, 1 tsp smoked paprika, ½ tsp black pepper, and ½ tsp dried thyme.
- Broth: 2 cups of vegetable, chicken, or beef broth for a rich, savory base.
- Optional Add-Ins: 1 cup of canned tomatoes or ½ cup of cream for added depth.
For the Campfire Touch:
- Olive Oil or Butter: 2 tbsp to prevent sticking and enhance flavor.
- Charcoal or Firewood: Essential for maintaining steady heat while cooking.
Packing Tip:
Pre-measure and store your spices in small resealable bags or containers to save space and stay organized. You can also chop veggies at home and pack them in airtight bags for convenience.
With these ingredients, you’re ready to create a meal that’s as comforting as it is satisfying. Let’s fire up the dutch oven recipes camping and get started!
Instructions for Dutch Oven Camping Magic
Now that you’ve gathered your ingredients, it’s time to bring this delicious dish to life! Follow these step-by-step instructions for a perfectly cooked, campfire-friendly meal:
Step 1: Prep Your Campfire
- Start by building a medium-sized campfire or prepare hot charcoal briquettes. You’ll need an even layer of heat under your dutch oven recipes camping for consistent cooking.
- If using a grill grate, make sure it’s steady and positioned over the heat source.
Step 2: Heat the Dutch Oven
- Place your dutch oven recipes camping over the fire or on hot coals, letting it preheat for 5 minutes.
- Add 2 tablespoons of olive oil or butter, swirling it around to coat the bottom evenly.
Step 3: Sauté the Aromatics
- Toss in the diced onion and minced garlic, stirring until fragrant and softened (about 3–4 minutes). This sets the foundation for rich, robust flavors.
Step 4: Cook the Protein
- Add your choice of protein to the Dutch oven. Brown it on all sides, ensuring it’s cooked through for maximum flavor. This step takes about 7–10 minutes.
Step 5: Add the Veggies and Seasonings
- Stir in the diced potatoes, carrots, or sweet potatoes. Sprinkle the seasoning blend (salt, smoked paprika, black pepper, and dried thyme) over the mixture and toss to coat evenly.
Step 6: Pour in the Liquid
- Gradually add the broth and canned tomatoes (if using), ensuring the ingredients are submerged. Give it a good stir, then cover the dutch oven recipes camping with its lid.
Step 7: Simmer and Cook
- Let the dish simmer for 30–40 minutes, checking occasionally to ensure the liquid hasn’t evaporated completely. Add more broth if needed.
- For an extra creamy texture, stir in the cream during the last 10 minutes of cooking.
Step 8: Serve and Enjoy
- Once the vegetables are tender and the flavors have melded beautifully, remove the dutch oven recipes camping from the heat. Serve hot with crusty bread, rice, or as-is for a rustic campfire feast.
Bonus Tip:
If you’re baking or slow-cooking, pile hot coals on the lid of the dutch oven recipes camping to evenly distribute heat from above. This trick works wonders for dishes like stews and casseroles!
Your camping masterpiece is now ready—dig in and savor the magic of a hearty, homemade meal under the open sky! 🌟
Pro Tips and Variations for dutch oven recipes camping
Cooking outdoors is an adventure in itself, and with a few handy tips, you can make your dutch oven recipes camping even better. Here’s how to level up your campfire cooking game and add your personal touch:
Pro Tips for Success:
- Master the Heat Control:
- Use fewer coals for a slow simmer and more for high-heat searing or baking.
- Rotate the dutch oven and lid every 10–15 minutes to ensure even cooking.
- Preseason Your Dutch Oven:
- Before your trip, ensure your dutch oven recipes camping is well-seasoned. This not only prevents sticking but also enhances the flavor of your meals.
- Layer Coals for Baking:
- For dishes like bread or cobblers, place coals evenly on top of the lid as well as underneath. This creates an oven-like effect.
- Keep It Clean:
- Line the bottom with parchment paper or foil for easier cleanup, especially when cooking sticky or baked dishes.
- Check the Liquid Levels:
- Outdoor conditions can cause liquids to evaporate faster. Always keep an eye on the broth and add more if needed to prevent burning.
Variations to Try:
- Vegetarian Delight:
- Swap the protein for hearty mushrooms or chickpeas, and add extra root vegetables for a satisfying vegetarian version.
- Spicy Kick:
- Stir in a dash of chili flakes or a teaspoon of hot sauce for a bold, fiery flavor.
- Herb Lover’s Dream:
- Experiment with fresh herbs like rosemary, basil, or parsley added just before serving for a burst of freshness.
- Creamy Comfort:
- For a richer texture, mix in a dollop of sour cream or coconut milk right at the end of cooking.
- Global Twists:
- Add curry powder and coconut milk for a Thai-inspired dish or sprinkle in smoked paprika and chorizo for a Spanish flair.
Bonus Hack:
Pack pre-measured spice mixes or marinades in small resealable bags. This saves space and ensures your dish is perfectly seasoned, even in the wilderness!
With these tips and ideas, your dutch oven recipes camping meals will go from great to unforgettable. Don’t be afraid to get creative—campfire cooking is all about embracing the adventure!
Serving Suggestions for dutch oven recipes camping
Now that your Dutch oven masterpiece is ready, let’s talk about how to serve it for maximum enjoyment. A hearty campfire meal deserves the right accompaniments and a touch of creativity to make it extra special.

Perfect Pairings for Your Dish:
- Crusty Bread or Dinner Rolls:
- Warm up some rustic bread or rolls over the fire for a delightful pairing. The crispy crust and soft interior are perfect for soaking up the savory juices.
- Fluffy Rice or Quinoa:
- Serve your dish over rice or quinoa to make it more filling. These grains are easy to cook on-site and pair wonderfully with stews or braised dishes.
- Campfire Potatoes:
- Roast foil-wrapped potatoes in the campfire embers while your main dish simmers. They’re a rustic and satisfying side option.
- Fresh Salad:
- Balance the hearty flavors with a simple salad of mixed greens, cherry tomatoes, and a light vinaigrette. It’s a refreshing contrast to a rich main course.
- Cheese Toppings:
- Sprinkle shredded cheese over the hot dish for a gooey, indulgent finish. Sharp cheddar, Parmesan, or smoked Gouda are great choices.
Creative Serving Ideas:
- Family-Style Feast:
- Serve the dish straight from the dutch oven recipes camping in the center of the table or campfire circle. Let everyone scoop their portions for a cozy communal vibe.
- Individual Bowls:
- Use sturdy camping bowls to serve personalized portions. Add garnishes like fresh herbs or a dollop of sour cream to make each bowl feel special.
- Edible Bowls:
- Hollow out bread bowls or roasted bell peppers for a fun and unique presentation. It’s both eco-friendly and delicious!
- Themed Campfire Night:
- Pair your meal with other campfire classics like s’mores for dessert or grilled corn on the cob. Create a complete outdoor dining experience.
Quick Garnishing Tips:
- Sprinkle freshly chopped parsley, cilantro, or chives for a pop of color and flavor.
- Add a squeeze of lemon or lime for brightness if the dish is rich.
- A drizzle of olive oil or balsamic glaze can elevate the presentation and taste.
With these serving suggestions, you can transform a simple meal into an unforgettable dining experience under the stars. Enjoy the rustic charm of your Dutch oven creation and the shared joy of outdoor cooking! 🌟
Conclusion: Why Dutch Oven Recipes Are Perfect for Camping
dutch oven recipes camping are truly a game-changer when it comes to outdoor cooking. Whether you’re cooking over a crackling campfire or a portable camping stove, the versatility and flavor that a Dutch oven offers make it the ultimate camping companion. From savory stews to decadent desserts, there’s no limit to the delicious possibilities you can create in one pot.
Key Benefits of Dutch Oven Cooking While Camping:
- One-Pot Wonders: No need for a bunch of pots and pans. Everything you need can be made in the Dutch oven, making cleanup a breeze.
- Tastes Better Outdoors: There’s something magical about cooking in nature, and a Dutch oven really enhances the flavors, making your meal taste richer and more comforting.
- Family & Group-Friendly: Dutch ovens are perfect for large gatherings. Whether it’s a simple stew or a hearty chili, everyone can dig in and enjoy together.
By now, you’re armed with all the knowledge and tips to make your camping meals unforgettable. Dutch oven cooking is not only practical, but it’s also a fantastic way to embrace the joy of cooking and eating in nature. Whether you’re a seasoned camper or a first-timer, your campfire meals will shine with these easy-to-follow recipes and creative tips.
Now, it’s your turn to experience the magic! Gather your ingredients, light that fire, and enjoy the delicious rewards of your camping adventure. Happy cooking, and don’t forget to share your tasty creations! 🌄🍲
Let the dutch oven recipes camping become a beloved tradition for your next outdoor escapade.
FAQs About dutch oven recipes camping
1. Can I use a Dutch oven on any camping stove?
Yes, you can use a Dutch oven on a camping stove as long as the stove’s surface can accommodate the size and weight of the Dutch oven. Make sure your stove has a sturdy platform to support the pot. For added versatility, many Dutch ovens are designed to be used over both open flames and stovetops, giving you flexibility in your outdoor cooking.
2. What’s the best type of Dutch oven for camping?
For camping, a cast-iron Dutch oven is often the best choice. It retains heat exceptionally well, ensuring even cooking. If you’re looking for a lightweight option, enameled Dutch ovens are also a great choice but be mindful of their weight. The size of your Dutch oven should depend on the number of people you’re cooking for. A 5-7 quart Dutch oven works well for small to medium-sized groups.
3. How do I maintain and clean my Dutch oven while camping?
Proper care ensures the longevity of your Dutch oven. After cooking, let it cool before cleaning. Here’s a simple routine:
Scrape off any food debris with a spatula or soft brush.
Use hot water to rinse, but avoid soap as it can strip the seasoning from the cast iron.
Dry it thoroughly and rub a thin layer of oil over the surface to prevent rust.
By doing this, your Dutch oven will continue to serve you well for many camping trips to come!
4. Can I make desserts in a Dutch oven while camping?
Absolutely! Dutch ovens are perfect for making delicious camping desserts like cobblers, cakes, and brownies. The even heat distribution creates the perfect crusts and caramelization, which is what makes Dutch oven desserts so irresistible. Try something like a berry cobbler or an apple crisp the next time you’re out in the wilderness for a sweet treat under the stars.
5. How do I get the best flavor in my Dutch oven meals?
The key to flavorful Dutch oven cooking lies in the slow, even heat distribution. Searing ingredients before adding liquids can deepen the flavors. Consider using herbs, spices, and broths to infuse your meal with rich, aromatic flavors. Also, don’t forget to use the lid during cooking to trap all the flavors and moisture, keeping your dishes tender and juicy.
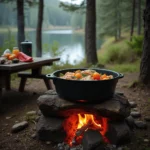
6. Can I cook directly in the campfire with my Dutch oven?
Yes, you can! One of the great things about Dutch ovens is their versatility. You can cook directly over the campfire by placing the Dutch oven in the coals or hanging it over the flames. Just be sure to monitor the heat carefully. Cooking over the fire requires a bit of practice, but the results are definitely worth it.
7. What are some easy Dutch oven recipes for beginners?
If you’re new to Dutch oven cooking, start with simple recipes like chili, stews, or roasted vegetables. These dishes are forgiving and allow you to get a feel for the cooking process. Once you’re more comfortable, you can experiment with more complex meals like casseroles or even a whole roast chicken!
Ready to Cook?
By now, you’ve got all the tips, tricks, and answers you need to make your Dutch oven meals a success. Whether you’re a first-time camper or a seasoned outdoor chef, your next camping trip will be filled with delicious and satisfying meals thanks to these trusty Dutch oven recipes. Enjoy the cooking experience, and happy camping! 🌲🍳
dutch oven recipes camping
With this easy-to-follow Dutch oven recipe, your camping meals are sure to be a hit! It's the perfect one-pot wonder that combines great flavors with minimal fuss—ideal for enjoying nature without sacrificing deliciousness. 🌄
- Dutch Oven (5-7 quart recommended)
- Camping stove or campfire
- Cooking spoon or spatula
- Lid for Dutch oven
1 lb chicken breast (or thighs)
1 onion, chopped
2 cloves garlic, minced
1 cup diced tomatoes
1 cup chicken broth
1 cup sliced carrots
1 cup sliced celery
1 tbsp dried thyme
1 tsp salt
1/2 tsp pepper
2 tbsp olive oil
1 tbsp lemon juice
Fresh parsley, for garnish
Prep the Chicken: Cut the chicken into bite-sized pieces and season with salt, pepper, and thyme.
Sauté Vegetables: Heat olive oil in a Dutch oven over medium heat. Add onion and garlic, cooking until softened (about 5 minutes).
Brown the Chicken: Add the chicken to the Dutch oven and cook until browned on all sides (about 5-7 minutes).
Add Liquids: Pour in the chicken broth and diced tomatoes. Stir to combine.
Simmer: Add the carrots, celery, and thyme. Cover and let the mixture simmer for 30-35 minutes or until the chicken is fully cooked and vegetables are tender.
Finish the Dish: Stir in lemon juice and adjust seasoning if needed. Garnish with fresh parsley before serving.
Serve: Serve directly from the Dutch oven or transfer to plates for a hearty camping meal.
- Low Carb and High Protein: This recipe is packed with lean protein from the chicken, making it ideal for a filling meal during camping adventures.
- Veggie-Rich: The carrots, celery, and tomatoes add fiber and vitamins to balance out the dish.