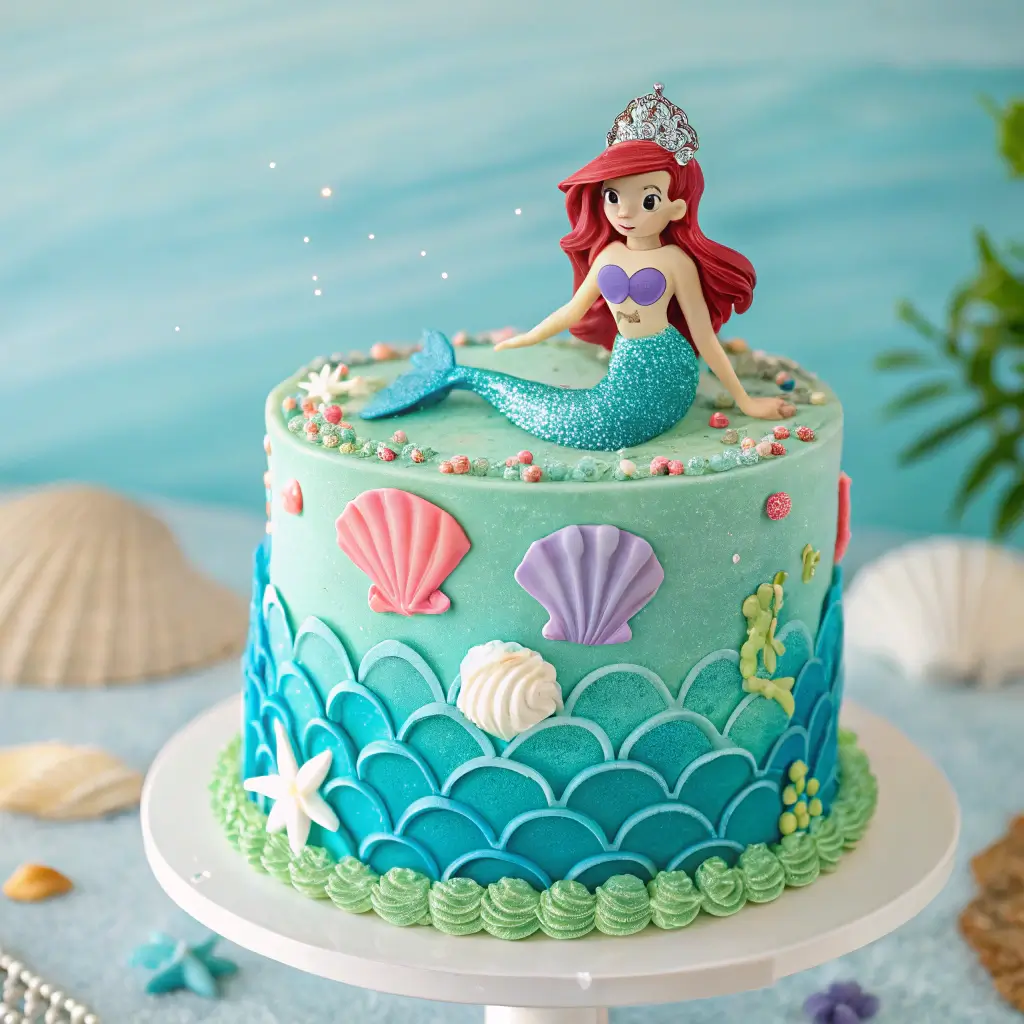
Mermaid birthday cakes are a whimsical delight that will make any celebration feel like a dive into an underwater wonderland! Picture layers of fluffy vanilla or vibrant blue raspberry cake, swirled with ocean-inspired buttercream waves and adorned with shimmering edible glitter. Decorate with colorful candy seashells and playful mermaid tails for that extra splash of magic. This enchanting treat is not just a feast for the eyes; it’s a deliciously sweet experience that will leave your little mermaids and mermen dreaming of ocean adventures long after the last slice is gone!
Table of Contents
Why You’ll Love This Recipe
- Delightful flavors that transport you to an underwater paradise.
- Visually stunning designs that will wow your guests.
- Easy-to-follow steps, perfect for bakers of all levels.
- Customizable options to match your party theme.
- Made with wholesome ingredients for a guilt-free treat.
Recipe Snapshot
| Feature | Details |
|---|---|
| Category: | Birthday Cake |
| Cuisine: | American |
| Prep Time: | 30 minutes |
| Cook Time: | 45 minutes |
| Total Time: | 1 hour 15 minutes |
| Dietary: | Nut-free, Vegetarian |
| Serves: | 8-10 |
| Best Served: | Chilled |
Ingredients
- All-purpose flour – a key base for your cake, providing structure.
- Sugar – sweetens the cake and helps create a moist texture.
- Baking powder – a leavening agent that helps the cake rise.
- Salt – enhances the flavors in your cake.
- Unsalted butter – adds richness and moisture; make sure it’s softened for easy mixing.
- Eggs – bind the ingredients together and add moisture.
- Milk – keeps the cake moist and adds flavor; you can use almond or oat milk as a substitute.
- Vanilla extract – adds a lovely flavor; opt for pure extract for the best taste.
- Food coloring – for creating vibrant mermaid-themed colors; gel colors work best.
- Whipped cream – perfect for frosting or as a topping for a light finish.
- Sprinkles – adds a fun, festive touch to your Mermaid birthday cakes.
- Edible glitter – for that magical sparkle effect.
Ingredients with measurements will be right under the article in the recipe card.
How to Make the Recipe
Gather your ingredients and tools for a fun baking adventure!
Step 1: Preheat the Oven
Set your oven to 350°F (175°C) and let it warm up while you prepare the batter.
Step 2: Prepare the Cake Pans
Grease and flour two 9-inch round cake pans to ensure easy removal later.
Step 3: Mix the Dry Ingredients
In a bowl, whisk together 2 cups of all-purpose flour, 1 ½ cups of sugar, 1 tablespoon of baking powder, and a pinch of salt.
Step 4: Cream the Butter and Sugar
In a large mixing bowl, beat ½ cup of softened butter with the sugar until light and fluffy.
Step 5: Add the Eggs
Incorporate 3 large eggs, one at a time, mixing well after each addition.
Step 6: Combine Wet Ingredients
Add 1 cup of milk and 1 teaspoon of vanilla extract to the mixture, stirring gently.
Step 7: Mix Dry and Wet Ingredients
Gradually add the dry ingredients to the wet mixture, mixing until just combined.
Step 8: Add Food Coloring
Divide the batter into bowls and add blue and green food coloring for a mermaid effect.
Step 9: Layer the Batter
Pour the colored batters into the prepared pans, swirling them together for a magical look.
Step 10: Bake the Cakes
Place the pans in the oven and bake for 25-30 minutes, or until a toothpick comes out clean.
Step 11: Cool the Cakes
Let the cakes cool in the pans for 10 minutes, then transfer them to a wire rack.
Step 12: Prepare the Frosting
Beat 1 cup of softened butter with 4 cups of powdered sugar and 2 tablespoons of milk until smooth.
Step 13: Decorate the Cakes
Spread frosting between the layers and on top, then add mermaid-themed decorations.
Step 14: Serve and Enjoy!
Slice the cake, serve it to your guests, and watch their faces light up with joy!
Pro Tips for Making the Recipe
•Use gel food coloring for vibrant hues that won’t alter the cake’s texture.
•Opt for a buttercream frosting for easy sculpting and a delightful taste.
•Chill your cakes before decorating to prevent crumbs from mixing into the frosting.
•Incorporate edible glitter or seashells for that extra magical touch.
•Don’t rush the layering; let each layer cool completely for a perfect stack.
How to Serve
Get ready to make your mermaid birthday cakes the star of the show with these fun serving suggestions!
- Serve slices on colorful plates for a vibrant presentation.
- Top each slice with edible glitter for a magical touch.
- Pair with ocean-themed cupcakes for a complete dessert table.
- Offer a side of whipped cream or vanilla ice cream for extra indulgence.
- Use seashell-shaped candies as a garnish on each plate.
- Set up a DIY decorating station with sprinkles and toppings for guests to customize their slices.
- Include a refreshing fruit punch or blue raspberry lemonade to complement the cake.
- Wrap leftover cake in fun mermaid-themed packaging for guests to take home.
Make Ahead and Storage
Proper storage ensures your mermaid birthday cakes stay fresh and delicious!
Storing Leftovers
Follow these tips to keep your cake tasty:
- Allow the cake to cool completely before storing.
- Wrap individual slices in plastic wrap.
- Place wrapped slices in an airtight container.
- Store in the refrigerator for up to 3 days.
Freezing
To freeze your cake without losing quality:
- Wrap the entire cake in plastic wrap tightly.
- Then wrap it in aluminum foil for extra protection.
- Label with the date and type of cake.
- Freeze for up to 3 months.
Reheating
For the best texture and taste when reheating:
- Thaw the cake in the refrigerator overnight.
- Remove wrapping before reheating.
- Warm slices in the microwave for 10-15 seconds.
- Alternatively, use an oven at 350°F for 5-10 minutes.
FAQs
What are some popular flavors for mermaid birthday cakes?
Popular flavors include vanilla, chocolate, and funfetti. You can also try tropical flavors like coconut or pineapple to enhance the mermaid theme. Don’t forget to add colorful layers or fillings to make it visually stunning!
Can I use a cake mix for a mermaid birthday cake?
Absolutely! Using a cake mix can save time and still yield delicious results. Just add some extra ingredients like vanilla extract or pudding mix to elevate the flavor and moisture.
How can I make my mermaid cake more visually appealing?
Use vibrant colors for frosting and decorations. Edible glitter, seashells, and mermaid tails can add a magical touch. Consider using a drip effect with colored ganache for an eye-catching finish!
What are some good substitutes for eggs in cake recipes?
You can use applesauce, mashed bananas, or yogurt as egg substitutes. Each option adds moisture and helps bind the ingredients together, making your cake just as delicious!
Final Thoughts
As you dive into the world of mermaid birthday cakes, remember that the magic lies in the joy of creating something special! These recipes are not just about the cake; they’re about making memories and celebrating with loved ones. So, gather your ingredients, unleash your creativity, and enjoy every delicious bite. You’ve got this—let the waves of fun roll in!
mermaid birthday cakes
Dive into the world of mermaid birthday cakes! Discover enchanting recipes that will make your celebration unforgettable! 🧜♀️🎂
- 9-inch round cake pans
- Mixing bowl
- Whisk
- Electric mixer
- Spatula
- Wire rack
Dry Ingredients
- 2 cups all-purpose flour (A key base for your cake, providing structure.)
- 1.5 cups sugar (Sweetens the cake and helps create a moist texture.)
- 1 tablespoon baking powder (A leavening agent that helps the cake rise.)
- 1 pinch salt (Enhances the flavors in your cake.)
Wet Ingredients
- 0.5 cups unsalted butter (Adds richness and moisture; softened for easy mixing.)
- 3 large eggs (Bind the ingredients together and add moisture.)
- 1 cup milk (Keeps the cake moist; almond or oat milk can be used as a substitute.)
- 1 teaspoon vanilla extract (Adds a lovely flavor; opt for pure extract for the best taste.)
- as needed drops food coloring (For creating vibrant mermaid-themed colors; gel colors work best.)
- 1 cup whipped cream (Perfect for frosting or as a topping for a light finish.)
- as needed sprinkles sprinkles (Adds a fun, festive touch to your mermaid cake.)
- as needed sprinkle edible glitter (For that magical sparkle effect.)
Preparation
Gather your ingredients and tools for a fun baking adventure!
Step 1: Preheat the Oven
Set your oven to 350°F (175°C) and let it warm up while you prepare the batter.
Step 2: Prepare the Cake Pans
Grease and flour two 9-inch round cake pans to ensure easy removal later.
Step 3: Mix the Dry Ingredients
In a bowl, whisk together 2 cups of all-purpose flour, 1 ½ cups of sugar, 1 tablespoon of baking powder, and a pinch of salt.
Step 4: Cream the Butter and Sugar
In a large mixing bowl, beat ½ cup of softened butter with the sugar until light and fluffy.
Step 5: Add the Eggs
Incorporate 3 large eggs, one at a time, mixing well after each addition.
Step 6: Combine Wet Ingredients
Add 1 cup of milk and 1 teaspoon of vanilla extract to the mixture, stirring gently.
Step 7: Mix Dry and Wet Ingredients
Gradually add the dry ingredients to the wet mixture, mixing until just combined.
Step 8: Add Food Coloring
Divide the batter into bowls and add blue and green food coloring for a mermaid effect.
Step 9: Layer the Batter
Pour the colored batters into the prepared pans, swirling them together for a magical look.
Step 10: Bake the Cakes
Place the pans in the oven and bake for 25-30 minutes, or until a toothpick comes out clean.
Step 11: Cool the Cakes
Let the cakes cool in the pans for 10 minutes, then transfer them to a wire rack.
Step 12: Prepare the Frosting
Beat 1 cup of softened butter with 4 cups of powdered sugar and 2 tablespoons of milk until smooth.
Step 13: Decorate the Cakes
Spread frosting between the layers and on top, then add mermaid-themed decorations.
Step 14: Serve and Enjoy!
Slice the cake, serve it to your guests, and watch their faces light up with joy!