Are you ready to take your high heat diy mortar mix recipe skills to the next level? Whether you’re building a pizza oven, upgrading your fireplace, or crafting a backyard fire pit, a durable and heat-resistant mortar mix is the unsung hero of these high-temperature projects. This simple DIY recipe combines affordability, versatility, and long-lasting strength, making it perfect for beginners and seasoned creators alike. Imagine creating something that not only withstands the heat but also stands the test of time. Let’s dive into a mix you’ll love to use, blending practicality with a touch of creative satisfaction!
Table of Contents
Key Benefits
When it comes to creating a high heat diy mortar mix recipe, the advantages go beyond just durability. This DIY recipe is designed to deliver professional-grade results while being accessible to anyone, even if it’s your first time working with mortar. Here’s why you’ll love using it:
- Exceptional Heat Resistance: Perfect for fireplaces, pizza ovens, and outdoor grills, this mix stands up to intense temperatures without cracking or crumbling.
- Cost-Effective: Save money by crafting your own mortar using affordable, easily available materials instead of buying pre-made options.
- Versatility: From building fire pits to repairing existing structures, this mix is suitable for a range of high-temperature applications.
- Ease of Use: Designed with simplicity in mind, the recipe requires no specialized skills or tools—just follow the steps, and you’re set!
- Long-Lasting Results: Once cured, this mortar offers exceptional strength and durability, ensuring your projects endure for years.
Whether you’re a DIY enthusiast or simply tackling a home improvement project, this recipe provides the perfect balance of reliability, affordability, and ease. Ready to give it a try? Let’s dive into the ingredients!
Ingredients
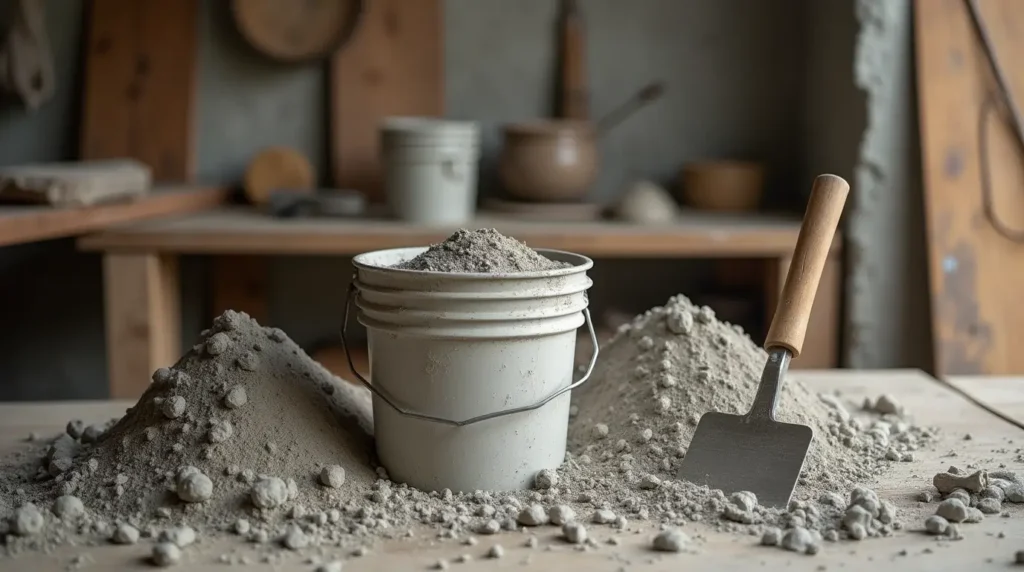
Creating ahigh heat diy mortar mix recipe starts with the right balance of simple, affordable materials. Here’s what you’ll need to ensure your project is both durable and heat-resistant:

- Portland Cement (2 Parts): Acts as the binding agent, holding all the components together with incredible strength.
- Fine Sand (3 Parts): Provides structure and texture to the mix, ensuring it’s easy to spread and work with.
- Fire Clay (1 Part): This essential ingredient enhances the mix’s ability to withstand extreme heat without cracking. Look for it at hardware stores or online.
- Lime (1 Part): Improves workability, creating a smoother consistency that’s easy to apply and shape.
- Water (as needed): Used to achieve the ideal consistency; start small and add gradually to avoid over-thinning.
Tips for Success: high heat diy mortar mix recipe
- Measure Carefully: Stick to the proportions for the best results. Too much water or a skewed ratio can weaken the mix.
- Choose Quality Materials: Opt for clean sand and fresh cement for better bonding and durability.
- Prep Your Workspace: Have all your materials and tools ready before mixing to ensure a smooth process.
With these ingredients on hand, you’re ready to mix up a batch of mortar that’s as tough as the projects you’re tackling. Let’s move on to the step-by-step instructions!
Instructions high heat diy mortar mix recipe
Ready to mix your high-heat mortar? Follow these simple, step-by-step instructions to ensure a strong, durable result:
- Prepare Your Workspace:
- Lay down a tarp or work in a clean, open area to avoid mess.
- Gather all your tools, including a mixing bucket, a sturdy trowel, and a measuring container.
- Combine Dry Ingredients:
- In a large mixing bucket, add 2 parts Portland cement, 3 parts fine sand, 1 part fire clay, and 1 part lime.
- Use a trowel or shovel to thoroughly mix the dry ingredients until the color and texture are uniform.
- Gradually Add Water:
- Slowly pour in water, a little at a time, while stirring the mixture.
- Aim for a consistency that is thick but pliable, similar to peanut butter. Avoid making it too runny, as this can weaken the mortar.
- Mix Until Smooth:
- Continue stirring until there are no lumps, and the ingredients are evenly combined.
- If the mix feels too stiff, add a splash of water; if it’s too wet, sprinkle in more sand or fire clay.
- Let the Mixture Rest:
- Allow the mortar to sit for about 5–10 minutes. This helps the ingredients bind and ensures a smoother application.
- Apply the Mortar:
- Using a trowel, spread the mortar evenly on your project surface.
- Work in small sections to maintain control and ensure proper adhesion.
Tips for Best Results: high heat diy mortar mix recipe
- Work Quickly: The mortar can start to set within 30–60 minutes, so mix only what you’ll use in that time frame.
- Clean as You Go: Wipe off excess mortar from tools and surfaces before it hardens to make cleanup easier.
- Check the Weather: Avoid working on extremely hot or cold days, as this can affect the curing process.
By following these steps, you’ll create a high-quality mortar mix that’s ready to handle even the most demanding high-heat applications. Now it’s time to bring your project to life!
Pro Tips and Variations high heat diy mortar mix recipe
Now that you have your mortar mix ready, here are some pro tips and creative variations to help you customize your mix for different projects and ensure long-lasting results:
Pro Tips for Success high heat diy mortar mix recipe
- Consistency is Key: When mixing, always aim for a thick, workable consistency that holds its shape without dripping. If the mix is too runny, it can weaken the mortar over time, especially in high-heat conditions.
- Use a Mortar Mixer: If you’re working on a large-scale project, consider using a mortar mixer to save time and effort. It ensures a smoother, more uniform mixture that’s harder to achieve by hand.
- Curing is Crucial: Allow your mortar to cure properly by letting it sit undisturbed for at least 24 hours. Curing helps it reach full strength and durability, especially under high temperatures.
- Avoid Overmixing: While it’s important to thoroughly mix your ingredients, overmixing can introduce air bubbles, which can weaken the final product.
Creative Variations for Different Projects
- For Fireplaces and Pizza Ovens: Add a bit more fire clay to the mix for enhanced heat resistance. This will help the mortar handle extreme temperatures without cracking.
- For Outdoor Fire Pits: If you’re using your mortar mix in an outdoor setting, consider adding a small amount of crushed stone to the mix. It can help with drainage and improve the mix’s stability.
- Eco-Friendly Option: Substitute part of the Portland cement with a green alternative like fly ash or slag. This creates a more environmentally friendly option without sacrificing strength.
- Extra Adhesion: If you need extra bonding power for tricky surfaces, try incorporating a bonding agent like acrylic fortifier into your mix. This can improve the mortar’s ability to stick to different materials, especially in areas exposed to constant heat.
Storage Tips: high heat diy mortar mix recipe
- Keep It Sealed: If you have leftover mortar, store it in an airtight container or a sealed plastic bag to prevent it from drying out. Keep it in a cool, dry place, and it should last for several weeks.
- Don’t Let It Set in the Bucket: Always use fresh mortar mix before it begins to set. Once the mix starts to harden, it won’t be usable for your project.
With these tips and variations, you’ll have the perfect mix for whatever high-heat DIY project you take on, and you can tweak it to fit your specific needs. Let’s move forward to serving suggestions!
Serving Suggestions high heat diy mortar mix recipe
Now that your high-heat mortar mix is ready, it’s time to explore some creative ways to use it in your projects. This versatile mortar mix can be applied in a variety of high-temperature settings, each with its own unique benefits. Here are some of the best ways to put your mix to work:
1. Fireplaces and Wood Stoves
This mortar is perfect for securing bricks in place within a fireplace or wood stove. Its heat-resistant properties ensure that it won’t crack under the intense heat generated by fire. Here’s how to apply it:
- Apply the mortar between the bricks as you lay them, pressing firmly to ensure a strong bond.
- Make sure to leave small gaps for expansion to avoid damage over time.
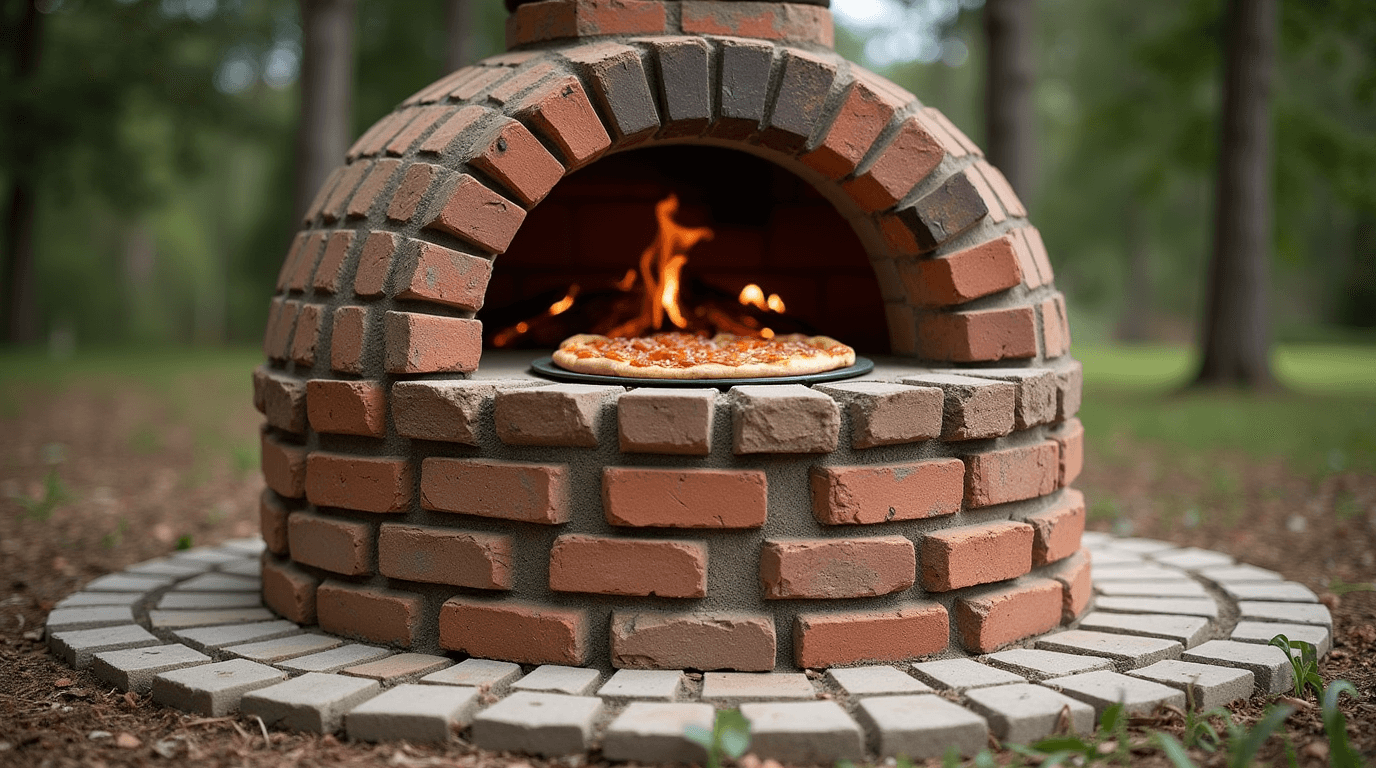
2. Pizza Ovens high heat diy mortar mix recipe
If you’re building a homemade pizza oven, this mix will be your best friend. The high-heat tolerance ensures that the mortar can handle the high temperatures required for baking without compromising strength.
- Spread the mortar between fire bricks as you assemble the oven base and walls.
- Make sure the surface is level for even heat distribution.
3. Outdoor Fire Pits
Creating an outdoor fire pit? This mortar mix will hold up beautifully, keeping your bricks securely in place even when exposed to harsh weather conditions.
- Start by placing bricks in a circular or square pattern and mortar them in place.
- Allow the mortar to cure fully before using the fire pit to ensure the best results.
4. Barbecue Grills and Smokers
For DIY enthusiasts looking to build or repair a grill or smoker, this mortar is a game-changer. It provides both strength and heat resistance to withstand the grilling process.
- Apply the mortar to hold bricks or stones together, ensuring no gaps for air to flow through.
5. Repairing Old Mortar
If you have existing high heat diy mortar mix recipe projects like a fireplace or pizza oven that need a little TLC, use this mortar mix to fill in cracks and gaps. It bonds tightly to old mortar, restoring your structure’s durability.
- Simply clean the cracks and gaps, apply the fresh mix, and smooth out the surface.
Bonus Tip: high heat diy mortar mix recipe
If you’re working with delicate materials like stone or glass, consider using a thinner layer of mortar to avoid any mess. A lighter touch ensures that your project looks professional while still maintaining excellent durability.
Whether you’re building from scratch or repairing a beloved high-heat structure, this DIY mortar mix will keep everything solid and secure. Enjoy the satisfaction of creating something long-lasting and strong!
Conclusion
Congratulations! You’ve now mastered the art of creating a high-heat DIY mortar mix that’s perfect for all your heat-resistant projects. Whether you’re building a fire pit, a pizza oven, or restoring an old fireplace, this recipe provides an easy-to-follow, durable solution that will withstand the test of time.
Key Takeaways: high heat diy mortar mix recipe
- Heat Resistance: This mortar mix is designed to hold strong against intense temperatures without cracking, making it ideal for high-heat environments.
- DIY-Friendly: With just a few simple ingredients and clear steps, you can create professional-grade mortar at home—saving time and money.
- Versatility: From grills to ovens and outdoor projects, this mix is perfect for a wide range of DIY endeavors.
By following this recipe, you’re not only investing in high-quality materials but also gaining the satisfaction of creating something with your own hands. Whether it’s a weekend project or part of a larger home improvement plan, your mortar mix will help ensure your work is sturdy and long-lasting.
Remember, patience is key when applying the mortar, and always allow it to cure properly for the best results. Enjoy your new high-heat creations, and feel free to share your progress!
FAQs high heat diy mortar mix recipe
It’s common to have a few questions when it comes to making your own high-heat mortar mix, especially if this is your first time. Below are some of the most frequently asked questions to help guide you through the process:
1. How long should I let the mortar cure?
Curing is an essential step in making sure your mortar mix is strong and durable. Allow your mortar to cure for at least 24–48 hours before using it in high-heat conditions. For the best results, let it cure for up to a week, especially if you’re working on large projects like a pizza oven or fireplace. The longer you allow it to cure, the stronger it will become.
2. Can I adjust the mix for different temperatures?
Yes! If you’re working with especially high temperatures, such as in pizza ovens or industrial applications, you can increase the amount of fire clay in your mix. This will boost the heat resistance and improve its durability under extreme conditions. Just keep the general proportions in mind to maintain the mix’s consistency.
3. What if my mortar starts setting before I’m done?
If you find that your mortar is starting to set too quickly, it’s a sign that you might have added too much water, or it could be too hot outside. To slow down the setting time, you can try adding a little more lime to make the mix more workable. Always aim to work in smaller batches if you’re doing a large project, so the mix doesn’t set before you can use it.
4. Can I store leftover mortar?
Yes, you can store leftover mortar! Simply seal it in an airtight container or heavy-duty plastic bag and keep it in a cool, dry place. Be sure to use it within a few weeks, as it will begin to harden over time. If you plan to store it for an extended period, you may need to add a bit more water when you’re ready to use it again.
5. What are the best tools for mixing and applying the mortar?
For mixing, a heavy-duty bucket and a sturdy trowel work best. If you’re working on a larger scale, consider using a mortar mixer for a smoother, more consistent mix. When applying, a trowel is ideal for spreading the mortar, but a pointing trowel can be useful for detailed work and filling smaller gaps.
6. Is this mix safe for outdoor projects?
Absolutely! This high-heat mortar mix is perfect for outdoor projects, including fire pits, barbecue grills, and other heat-intensive structures. It will hold up well against the elements, ensuring your outdoor creations stay strong and durable year after year.
By addressing these common questions, I hope you feel more confident in your ability to create a reliable, high-heat mortar mix for your DIY projects. Whether you’re a seasoned pro or just starting out, this mix is a great way to tackle those high-temperature tasks. If you have any more questions, feel free to reach out—I’m happy to help!
high heat diy mortar mix recipe
Create a durable high-heat DIY mortar mix with this easy recipe. Perfect for fire pits, pizza ovens, and more! Ensure strength and heat resistance in every project.
Nutrition Information (per serving):
- Calories: N/A
- Fat: N/A
- Protein: N/A
- Carbs: N/A
- Fiber: N/A
- Sugar: N/A