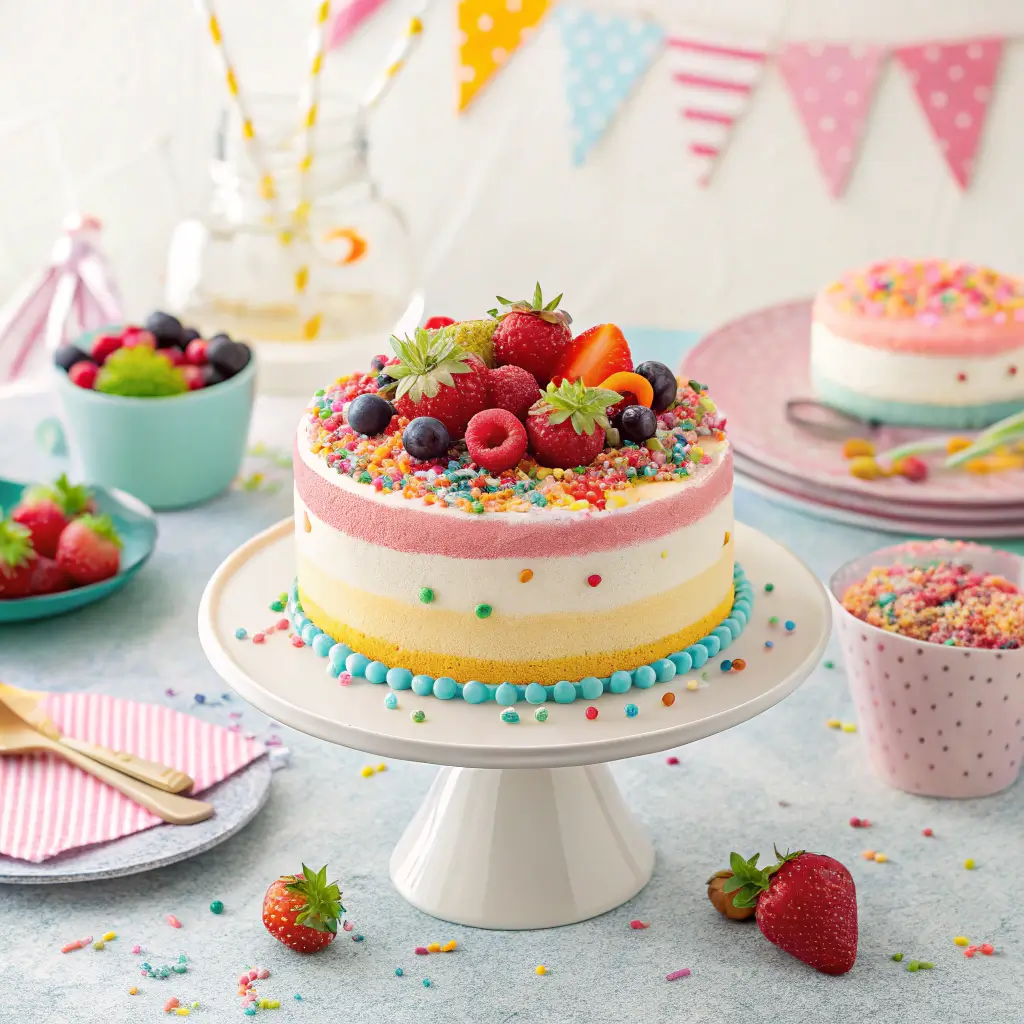
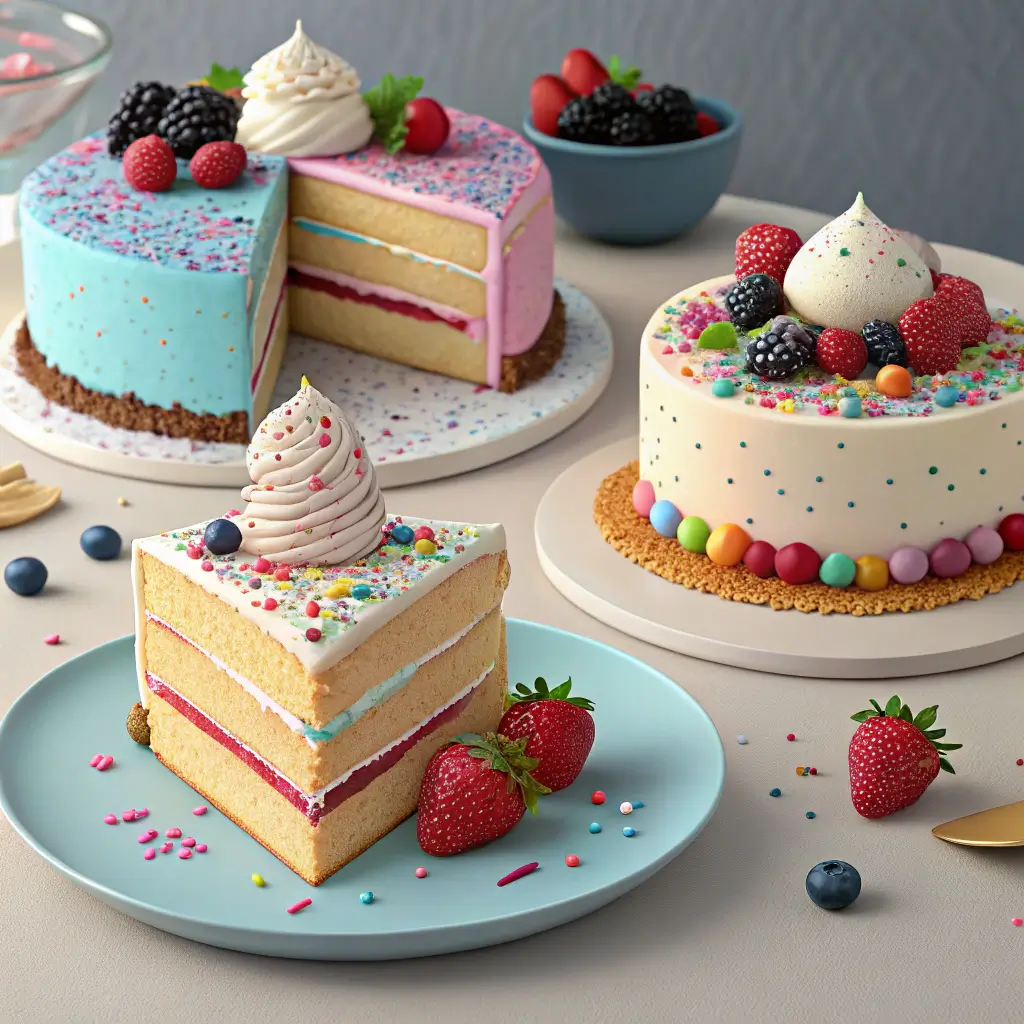
Happy cakes are the delightful centerpiece for any celebration, bursting with flavor and cheer! Imagine a fluffy vanilla sponge, kissed with the sweetness of ripe bananas and a splash of creamy coconut milk, creating a moist and tender crumb. Topped with a luscious whipped cream frosting and adorned with vibrant berries, each slice is a bite of pure joy. Perfect for birthdays, anniversaries, or just because, these cakes bring smiles and warmth to every gathering. Let the happiness unfold as you share this scrumptious treat with loved ones!
Table of Contents
Why You’ll Love This Recipe
- Each bite is a burst of happiness that brightens your day!
- Perfect for any celebration, big or small, making memories sweeter.
- Easy to customize with your favorite flavors and toppings.
- Made with wholesome ingredients, ensuring a guilt-free indulgence.
- Brings friends and family together for a joyful baking experience.
Recipe Snapshot
| Feature | Details |
|---|---|
| Category: | Dessert |
| Cuisine: | American |
| Prep Time: | 20 minutes |
| Cook Time: | 30 minutes |
| Total Time: | 50 minutes |
| Dietary: | Vegetarian |
| Serves: | 8 |
| Best Served: | With frosting and sprinkles |
Ingredients
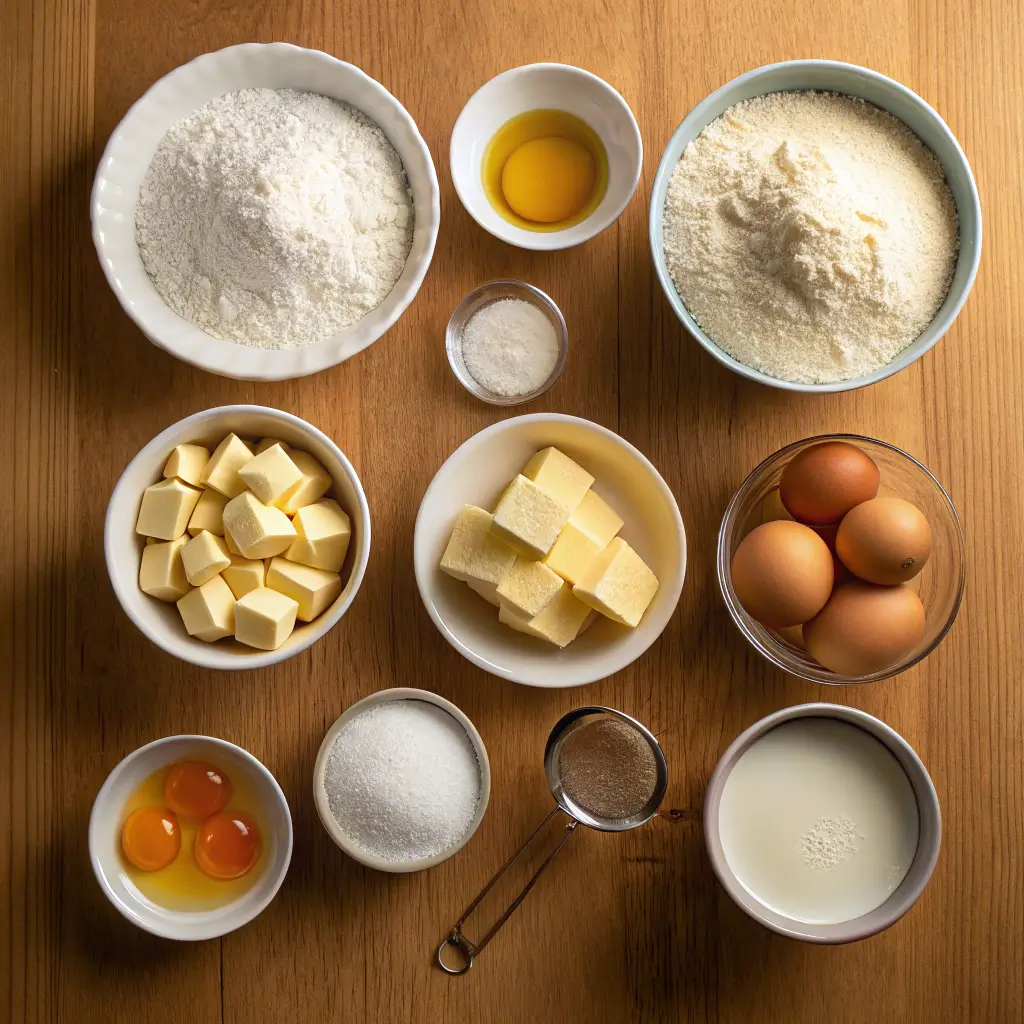
- All-purpose flour – a versatile base for a fluffy cake.
- Sugar – adds sweetness and helps with browning.
- Baking powder – ensures your cake rises perfectly.
- Salt – enhances the flavors of the other ingredients.
- Unsalted butter – provides richness and moisture.
- Eggs – binds the ingredients and adds structure.
- Milk – keeps the cake moist and adds creaminess.
- Vanilla extract – infuses a delightful aroma and flavor.
- Vegetable oil – adds moisture and keeps the cake tender.
- Food coloring – for a fun and vibrant appearance.
Ingredients with measurements will be right under the article in the recipe card.
How to Make the Recipe
Get ready to whip up some delightful happy cakes that will bring smiles to every face!
Step 1: Gather Your Ingredients
Collect 2 cups of all-purpose flour, 1 cup of sugar, 1/2 cup of unsalted butter (softened), 1 cup of milk, 2 large eggs, 2 teaspoons of baking powder, 1 teaspoon of vanilla extract, and a pinch of salt.
Step 2: Preheat the Oven
Preheat your oven to 350°F (175°C) to get it nice and warm for baking.
Step 3: Mix the Dry Ingredients
In a large bowl, whisk together the flour, baking powder, and salt until well combined.
Step 4: Cream the Butter and Sugar
In another bowl, beat the softened butter and sugar together until fluffy and light in color.
Step 5: Add the Eggs and Vanilla
Crack in the eggs one at a time, mixing well after each addition. Stir in the vanilla extract for that lovely aroma!
Step 6: Combine Wet and Dry Ingredients
Gradually add the dry mixture to the wet mixture, alternating with the milk. Mix until just combined.
Step 7: Prepare the Baking Pan
Grease and flour your cake pans or line them with parchment paper for easy removal.
Step 8: Pour the Batter
Divide the batter evenly between the prepared pans, smoothing the tops with a spatula.
Step 9: Bake the Cakes
Place the pans in the preheated oven and bake for 25-30 minutes, or until a toothpick comes out clean.
Step 10: Cool the Cakes
Once baked, let the cakes cool in the pans for 10 minutes, then transfer them to a wire rack to cool completely.
Step 11: Frost and Decorate
Once cool, frost with your favorite icing and add sprinkles or fruits for that extra happy touch!
Step 12: Enjoy Your Happy Cakes!
Slice, serve, and watch the joy unfold as everyone enjoys your delightful creations!
Pro Tips for Making the Recipe
•Use room temperature ingredients for a smoother batter.
•Experiment with natural sweeteners like honey or maple syrup for a unique flavor.
•Don’t overmix the batter; mix just until combined for a fluffier cake.
•Add a pinch of salt to enhance the sweetness and balance flavors.
•Decorate with fresh fruits or edible flowers for a cheerful presentation.
How to Serve
- Pair with a scoop of vanilla ice cream for a delightful contrast.
- Serve alongside fresh berries for a burst of color and flavor.
- Top with whipped cream and a sprinkle of colorful sprinkles for extra fun.
- Drizzle with chocolate or caramel sauce for a decadent touch.
- Enjoy with a cup of herbal tea for a cozy afternoon treat.
- Slice and serve at birthday parties with fun candles on top.
- Offer mini versions as party favors for guests to take home.
- Serve with a side of fruit salad for a refreshing balance.
- Pair with a glass of sparkling lemonade for a festive vibe.
- Use as a base for a dessert bar with various toppings and sauces.
Make Ahead and Storage
To enjoy your happy cakes even longer, follow these simple storage tips!
Storing Leftovers
• Allow cakes to cool completely before storing.
• Wrap individual slices in plastic wrap.
• Place wrapped slices in an airtight container.
• Store in the refrigerator for up to 3 days.
• For longer storage, consider freezing.
Freezing
• Wrap whole cakes tightly in plastic wrap.
• Place wrapped cakes in a freezer-safe bag or container.
• Label with the date and type of cake.
• Freeze for up to 3 months for best quality.
Reheating
• Thaw cakes in the refrigerator overnight.
• For a warm slice, microwave for 10-15 seconds.
• Alternatively, reheat in a preheated oven at 350°F for 5-10 minutes.
• Enjoy your happy cakes warm for the best flavor!
FAQs
What are happy cakes?
Happy cakes are delightful, cheerful desserts that bring joy to any celebration. They can be made in various flavors and styles, often decorated with vibrant colors and fun toppings to enhance their appeal.
Can I use substitutes for common ingredients?
Absolutely! If you need to avoid certain ingredients, you can use alternatives like applesauce for eggs or almond milk instead of regular milk. These substitutes work well and keep your happy cakes delicious.
How can I make my happy cakes more festive?
To make your happy cakes extra festive, consider adding colorful sprinkles, edible glitter, or themed decorations that match the occasion. You can also use fun-shaped cake pans for a unique presentation!
What’s the best way to store happy cakes?
Store your happy cakes in an airtight container at room temperature for up to three days. If you need to keep them longer, refrigerate them, but be sure to let them come to room temperature before serving for the best taste.
Final Thoughts
As you whip up your happy cakes, remember that each bite is a little piece of joy! These delightful treats are not just simple to make, but they also bring smiles to every gathering. So, gather your loved ones, share the laughter, and indulge in the sweetness of life. Enjoy the process, and let the happiness of your creations fill your home with warmth and cheer!
happy cakes
Bake delightful happy cakes that bring smiles to every occasion! Discover the joy of creating these sweet treats today! 🎂✨
- Cake pans
- Large bowl
- Mixing bowl
- Whisk
- Spatula
- Wire rack
Dry Ingredients
- 2 cups all-purpose flour (A versatile base for a fluffy cake.)
- 2 teaspoons baking powder (Ensures your cake rises perfectly.)
- 1 teaspoon salt (Enhances the flavors of the other ingredients.)
Wet Ingredients
- 1 cup sugar (Adds sweetness and helps with browning.)
- 1/2 cup unsalted butter (Provides richness and moisture.)
- 1 cup milk (Keeps the cake moist and adds creaminess.)
- 2 large eggs (Binds the ingredients and adds structure.)
- 1 teaspoon vanilla extract (Infuses a delightful aroma and flavor.)
- 1/4 cup vegetable oil (Adds moisture and keeps the cake tender.)
- as needed drops food coloring (For a fun and vibrant appearance.)
Step 1: Gather Your Ingredients
Collect all ingredients listed above.
Step 2: Preheat the Oven
Preheat your oven to 350°F (175°C).
Step 3: Mix the Dry Ingredients
In a large bowl, whisk together the flour, baking powder, and salt until well combined.
Step 4: Cream the Butter and Sugar
In another bowl, beat the softened butter and sugar together until fluffy and light in color.
Step 5: Add the Eggs and Vanilla
Crack in the eggs one at a time, mixing well after each addition. Stir in the vanilla extract.
Step 6: Combine Wet and Dry Ingredients
Gradually add the dry mixture to the wet mixture, alternating with the milk. Mix until just combined.
Step 7: Prepare the Baking Pan
Grease and flour your cake pans or line them with parchment paper.
Step 8: Pour the Batter
Divide the batter evenly between the prepared pans, smoothing the tops with a spatula.
Step 9: Bake the Cakes
Place the pans in the preheated oven and bake for 25-30 minutes, or until a toothpick comes out clean.
Step 10: Cool the Cakes
Once baked, let the cakes cool in the pans for 10 minutes, then transfer them to a wire rack to cool completely.
Step 11: Frost and Decorate
Once cool, frost with your favorite icing and add sprinkles or fruits for that extra happy touch!
Step 12: Enjoy Your Happy Cakes!
Slice, serve, and watch the joy unfold as everyone enjoys your delightful creations!
Essential nutrition facts per serving:
| Nutrient | Amount |
|---|---|
| Calories | 250 |
| Fat | 10g |
| Protein | 3g |
| Carbs | 38g |