
Imagine diving into a bowl of velvety pasta, each twirl coated in a rich, creamy sauce that dances on your palate. The aroma of garlic and herbs wafts through the air, inviting you to take that first bite. As you savor the luscious texture, the flavors meld together in perfect harmony, making every mouthful a delightful experience. Whether it’s a dreamy risotto or a decadent dessert, these creami recipes promise to wrap you in warmth and comfort, turning any meal into a celebration. Cream-based dishes like Alfredo pasta and risotto have deep roots in global culinary traditions, often associated with indulgent flavors and rich textures — learn more about their origins on Wikipedia. Get ready to indulge in pure deliciousness!
Table of Contents
Why You’ll Love This Recipe
- Trust me, you’re going to love this creamy goodness!
- This one’s a game-changer for weeknight dinners.
- Perfect for impressing guests without breaking a sweat.
- Endless variations to keep your taste buds dancing!
- It’s comfort food that feels indulgent but is oh-so-simple!
Recipe Snapshot
| Feature | Details |
|---|---|
| Category | Side Dish |
| Cuisine | American-inspired comfort food |
| Prep Time | 10 minutes |
| Cook Time | 15 minutes |
| Total Time | 25 minutes |
| Dietary | Vegetarian |
| Serves | 4 |
| Best Served | Hot and cheesy right off the cob! |
Ingredients
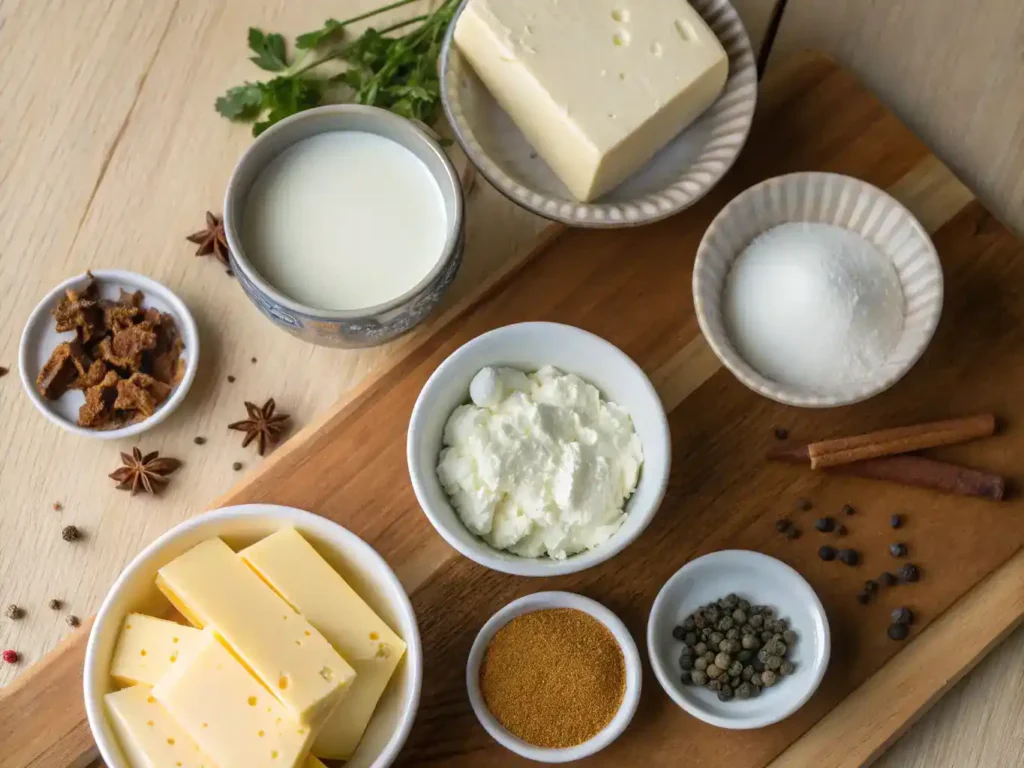
- Heavy Cream – Essential for achieving that rich, creamy texture. For best results, use heavy cream with at least 36% milk fat, as recommended by the U.S. Department of Agriculture (USDA).
- Milk – Adds a lighter consistency and balances the richness of the cream. Different types of milk, such as whole, 2%, or skim, affect the creaminess and nutritional profile — check out the USDA’s milk nutrition comparison for details.
- Butter – Enhances flavor and adds a silky finish to dishes.
- Cheese – Provides a savory depth; choose your favorite for different flavor profiles.
- Eggs – Acts as a binding agent and adds richness to creamy recipes.
- Vanilla Extract – A must for sweet creamy dishes, enhancing overall flavor.
- Nutmeg – A pinch adds warmth and complexity to creamy sauces and desserts.
- Salt – Balances flavors and enhances the creaminess of the dish.
Ingredients with measurements will be right under the article in the recipe card.
How to Make the Recipe
Get ready to whip up something delicious! Follow these easy steps to create your creamy masterpiece.
Step 1: Gather Your Ingredients
Collect all the necessary ingredients. Make sure you have everything ready to go!
Step 2: Prepare Your Base
In a mixing bowl, combine your base ingredients. This could be cream, milk, or yogurt depending on your recipe.
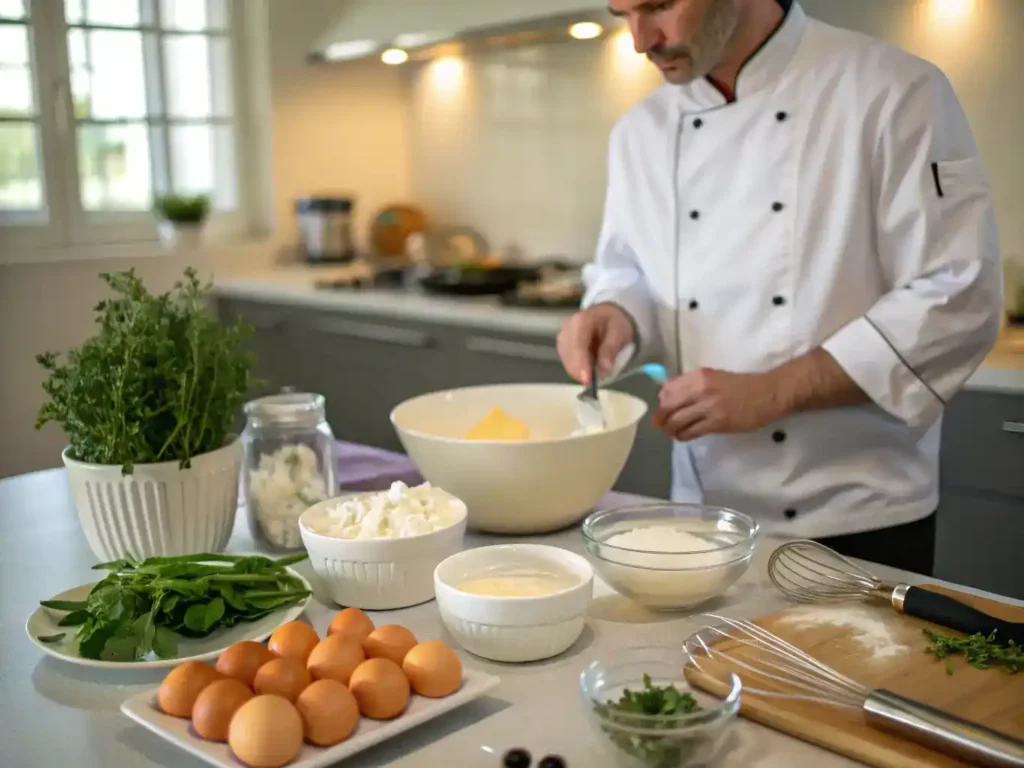
Step 3: Mix It Up
Using a whisk or mixer, blend the ingredients until smooth and creamy. Don’t rush; enjoy the process!
Step 4: Add Flavorings
Stir in your favorite flavorings like vanilla, cocoa, or spices. Taste as you go for the perfect balance!
Step 5: Chill or Cook
Depending on your recipe, either chill the mixture in the fridge or cook it on the stove. Keep an eye on it!
Step 6: Serve and Enjoy
Once ready, serve your creamy dish in bowls or glasses. Don’t forget to garnish for that extra touch!
Step 7: Share the Love
Invite friends or family to enjoy your creation. Sharing is the best part of cooking!
Pro Tips for Making the Recipe
- Use fresh ingredients for the best flavor and texture.
- Don’t rush the cooking process; let flavors meld together.
- Experiment with different spices to personalize your dish.
- Adjust the creaminess by adding more or less liquid as needed.
- Serve immediately for the best taste and presentation.

How to Serve
Delight in your creami recipes with these fun serving suggestions:
- Top with fresh herbs for a burst of flavor.
- Serve alongside crusty bread for dipping.
- Pair with a crisp salad for a refreshing contrast.
- Drizzle with a balsamic reduction for a gourmet touch.
- Garnish with grated cheese for extra richness.
- Offer a side of roasted vegetables for a colorful plate.
- Enjoy with a glass of white wine to elevate the experience.
- Use as a filling for stuffed pasta or crepes for a twist.
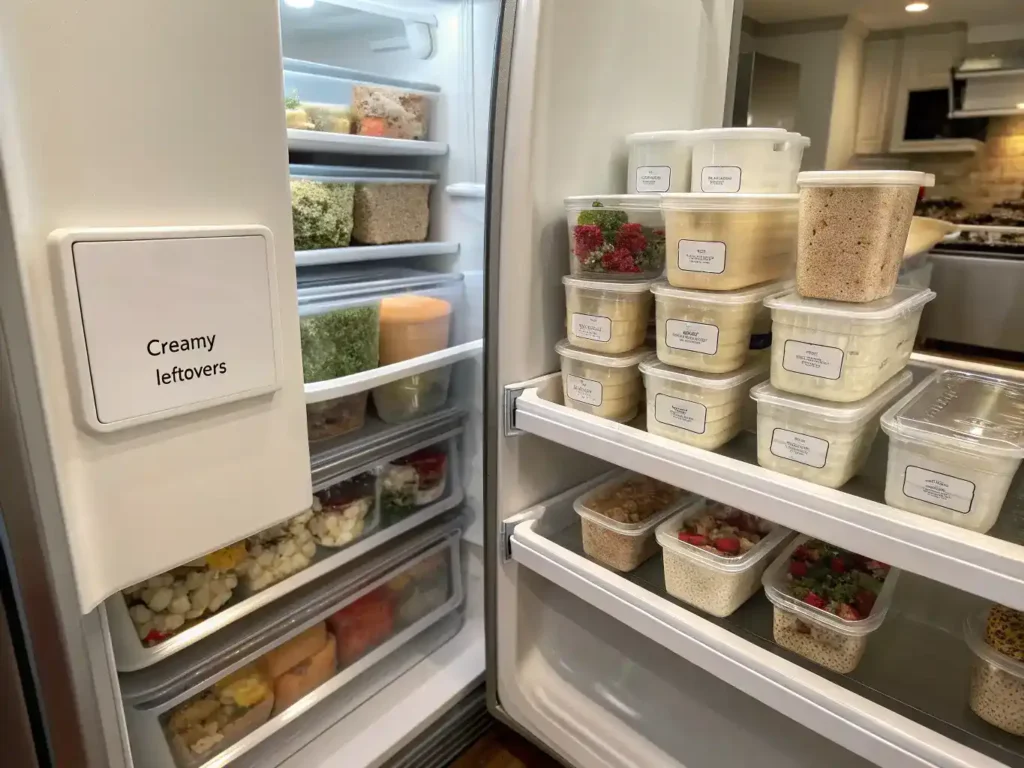
Make Ahead and Storage
Storing Leftovers
- Allow the dish to cool completely before storing.
- Transfer to an airtight container for best results.
- Label the container with the date for easy tracking.
- Store in the refrigerator for up to 3-4 days.
Freezing
- Cool the dish thoroughly before freezing.
- Use freezer-safe containers or bags to prevent freezer burn.
- Leave some space in the container for expansion.
- Label with the date and type of dish for easy identification.
- Freeze for up to 2-3 months for optimal quality. Note that dairy-rich recipes may change texture slightly after freezing — this guide from the University of Minnesota Extension explains how to freeze creamy foods effectively.
Reheating “creami recipes”
- Thaw in the refrigerator overnight for best results.
- Reheat on the stove or in the microwave, stirring occasionally.
- Add a splash of cream or broth to restore creaminess.
- Heat until warmed through, but avoid boiling.
FAQs “creami recipes”
What are some easy creami recipes for beginners?
If you’re just starting out, try simple recipes like creamy pasta or a basic cream sauce. These dishes require minimal ingredients and are quick to prepare, making them perfect for novice cooks.
Can I substitute ingredients in creami recipes?
Absolutely! You can often swap heavy cream for alternatives like coconut milk or Greek yogurt, depending on your dietary needs. Just keep in mind that this may alter the flavor and texture slightly.
How can I make my creami dishes healthier?
To lighten up your creami recipes, consider using low-fat dairy options or incorporating more vegetables. You can also reduce the amount of cream used and add broth for flavor without the extra calories. The American Heart Association offers guidelines for heart-healthy cooking that can help reduce saturated fats while preserving flavor.
What are some tips for achieving the perfect creamy texture?
For a smooth and creamy texture, make sure to whisk your ingredients thoroughly and cook over low heat. Avoid boiling, as this can cause separation. Adding a bit of cheese or butter at the end can also enhance creaminess.
Final Thoughts
There you have it—your journey into the world of creami recipes! Each dish is a delightful hug for your taste buds, and the best part? They’re so easy to whip up! So grab your ingredients, gather your loved ones, and dive into the creamy goodness. Remember, cooking is all about joy and sharing, so enjoy every spoonful and let the smiles unfold!
creami recipes

Discover mouthwatering creami recipes that will elevate your cooking! Easy steps to create rich, creamy dishes everyone will love! 🍽️✨
- Mixing bowl
- Whisk or Mixer
Base Ingredients
- 1 cup Heavy Cream (Essential for achieving that rich, creamy texture.)
- 1/2 cup Milk (Adds a lighter consistency and balances the richness of the cream.)
Flavor Enhancers
- 2 tablespoons Butter (Enhances flavor and adds a silky finish to dishes.)
- 1 cup Cheese (Provides a savory depth; choose your favorite for different flavor profiles.)
- 2 large Eggs (Acts as a binding agent and adds richness to creamy recipes.)
- 1 teaspoon Vanilla Extract (A must for sweet creamy dishes, enhancing overall flavor.)
- 1/4 teaspoon Nutmeg (A pinch adds warmth and complexity to creamy sauces and desserts.)
- to taste Salt (Balances flavors and enhances the creaminess of the dish.)
Step 1: Gather Your Ingredients
Collect all the necessary ingredients. Make sure you have everything ready to go!
Step 2: Prepare Your Base
In a mixing bowl, combine your base ingredients. This could be cream, milk, or yogurt depending on your recipe.
Step 3: Mix It Up
Using a whisk or mixer, blend the ingredients until smooth and creamy. Don’t rush; enjoy the process!
Step 4: Add Flavorings
Stir in your favorite flavorings like vanilla, cocoa, or spices. Taste as you go for the perfect balance!
Step 5: Chill or Cook
Depending on your recipe, either chill the mixture in the fridge or cook it on the stove. Keep an eye on it!
Step 6: Serve and Enjoy
Once ready, serve your creamy dish in bowls or glasses. Don’t forget to garnish for that extra touch!
Step 7: Share the Love
Invite friends or family to enjoy your creation. Sharing is the best part of cooking!